Distressing Furniture: 10 Must Try Techniques
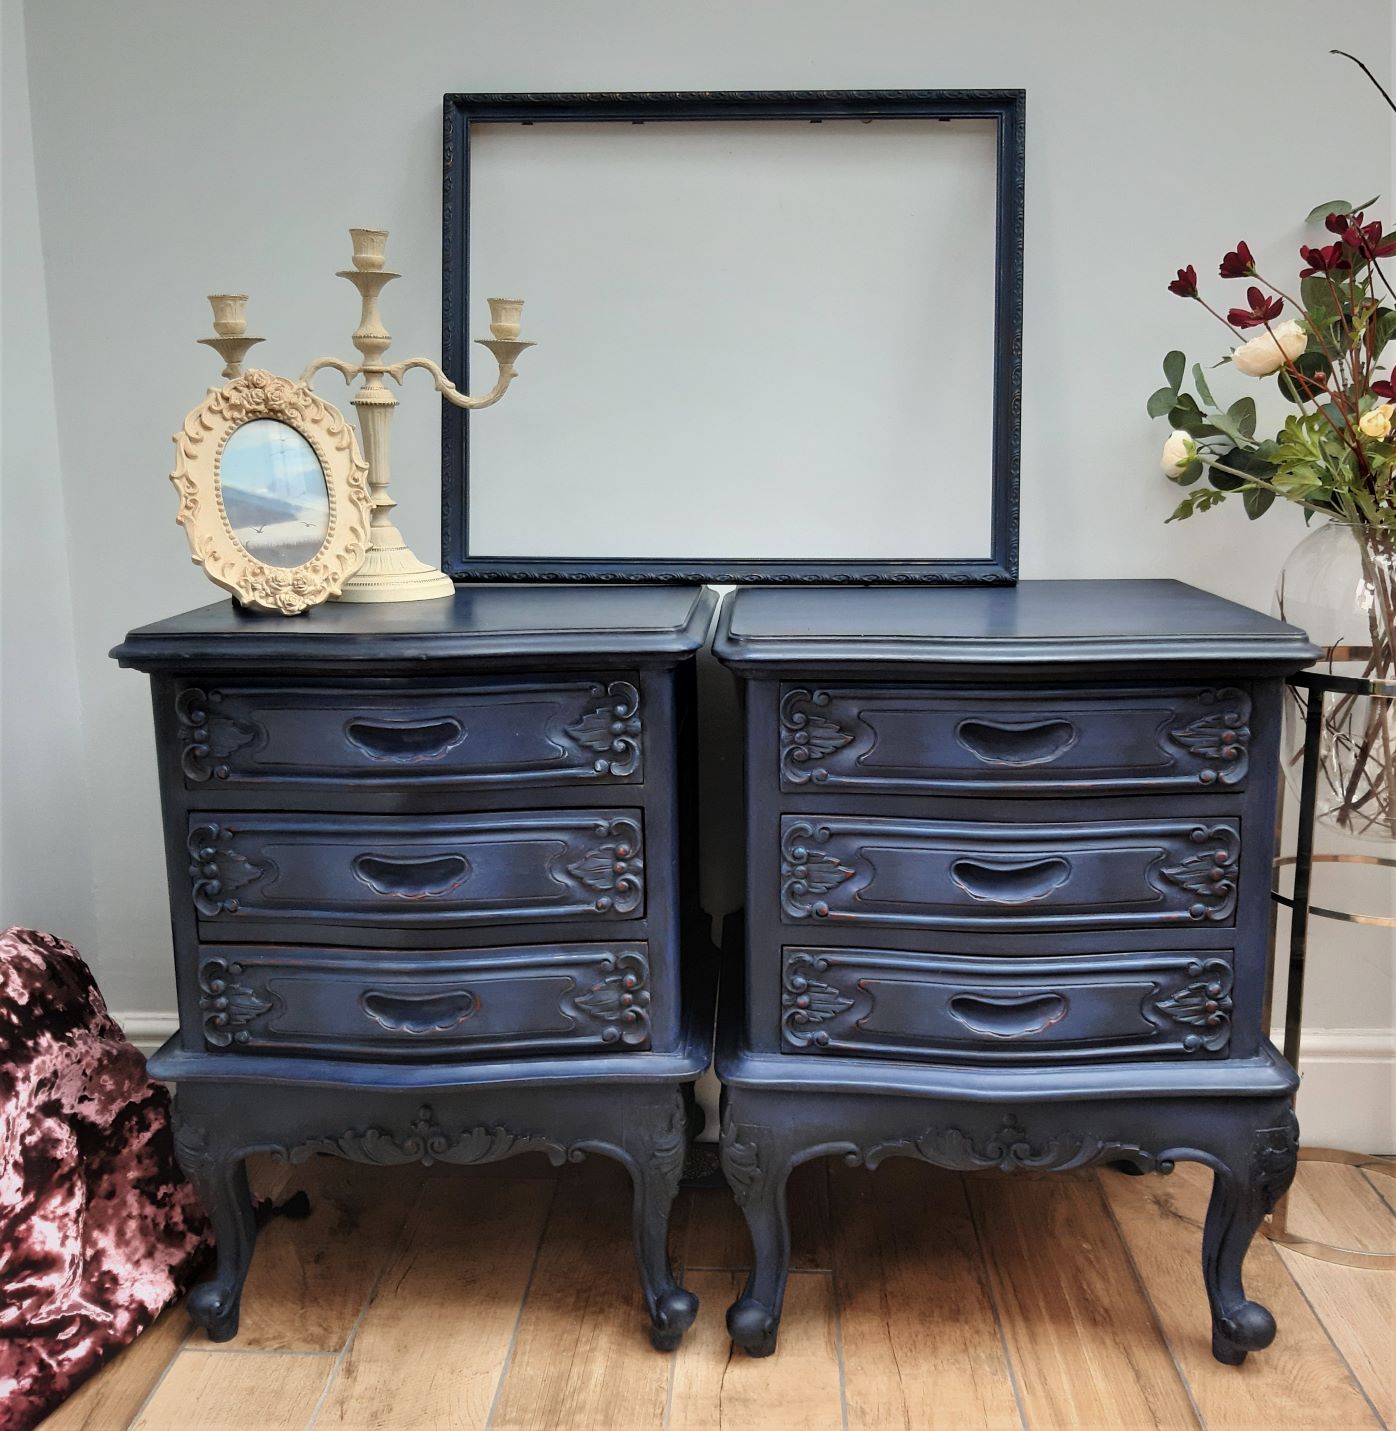
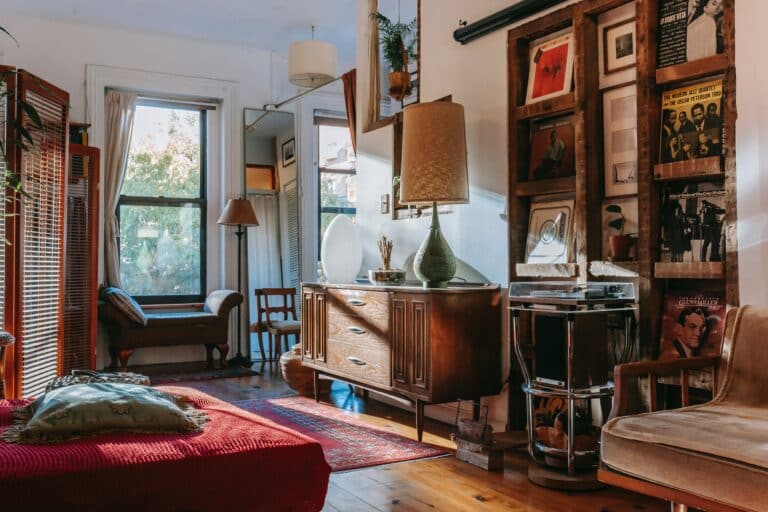
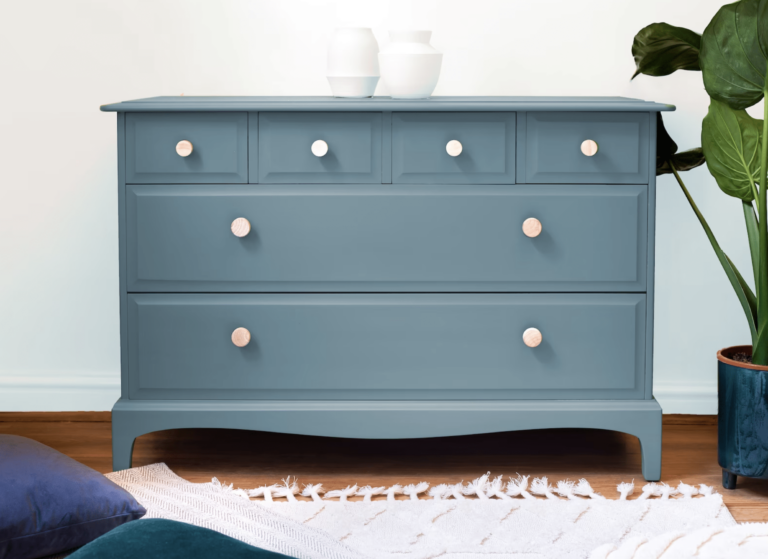
If we had to describe distressed furniture in one word, it would be charming. Distressed furniture has a certain allure, whether it’s the great hues or its ability to look vintage, that makes it one of the most sought-after aesthetic and functional elements in many houses.
Choosing distressed furniture for your home can also be one of your creative projects. You can either make one of your old pieces have the charm of distressed furniture or buy a bland one and revamp it.
If you want to incorporate these lovely pieces of furniture into your home but don’t know where to begin, you’ve come to the right place. You will see why!
Distressing Furniture: Easy Techniques You Can Pull Off
In this article, we will take you on a comprehensive journey through the most efficient techniques for creating distressed furniture. Whether you are a seasoned DIY expert or a beginner wanting to explore your artistic side, you will discover that creating distressed furniture is not only doable but also a really rewarding experience.
So, let’s cut to the chase and get started!
1. Candle Distressing
If you want a simple way to create a single or multilayered distressed furniture look, use the candle technique; we are confident it will produce the desired results. This technique can be used on both raw wood and already painted furniture in your home that you wish to update.
First, prepare the wood for painting by cleaning it and smoothing it out. Remove as much of the current finish as possible. You can also sand the surface to achieve a neat look. You can also whitewash the wood to get the perfect base if necessary.
After you’ve finished cleaning and whitewashing, choose a hue for the base, preferably a darker one, and paint it. Remember that this is the shade that will show through the distressed regions, so choose accordingly. You can use popular dark shades like black or dark brown. We’re trying for a dark brown base here.
After applying the base coat, the next thing you should do is apply wax with a candle. You can go for a pillar candle if you want to cover large areas easily. Rub the candle on the random areas for an uneven coat and a distressed look. You should apply some pressure and make sure to press hard enough to get the right texture.
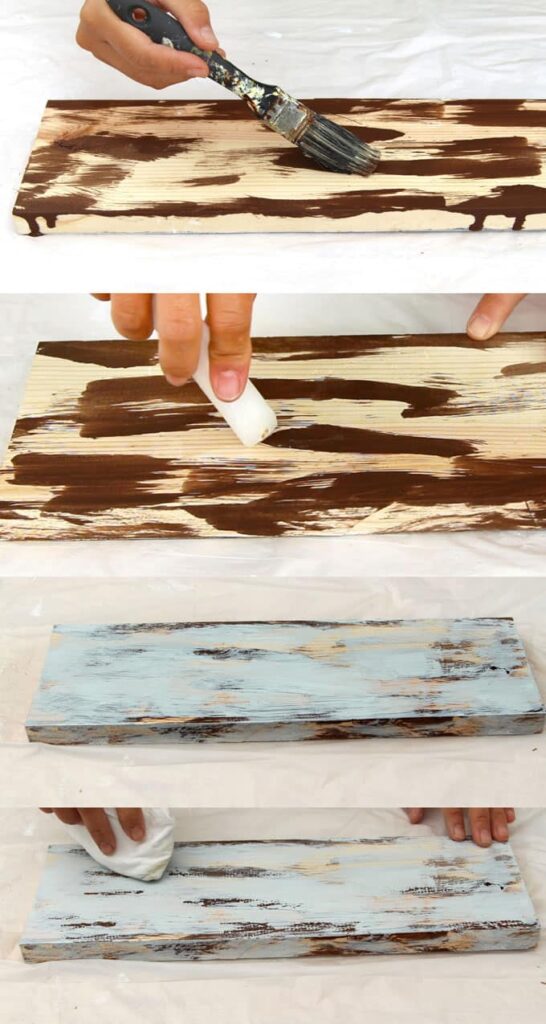
Now choose a second coat, preferably a color that contrasts with the base coat, and apply it all over the wood piece. Once it gets dry, you can either scrape it off unevenly with a sanding block or grit-sand paper or just put some pressure on it with a rag. The paint will come off where the wax was applied to the wood.
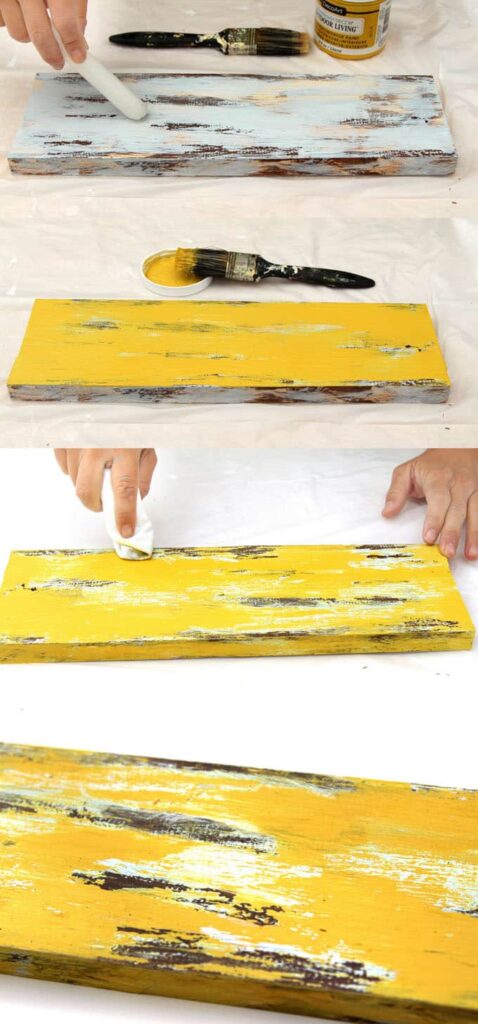
The previous step gave us the distressed furniture look on the wood. If you wish to add a third coat, simply apply wax unevenly over the board again and continue the entire procedure with a different color.
2. Sandpaper Distressing
Sandpaper distressing is for you if you want a very easy and old-fashioned technique for distressing your wood. Let’s have a look at how to master this method in two different situations.
Pre-painted Wood
If you’re dealing with pre-painted wood, all you need to do is take some sandpaper or a sand block (you can even wrap the sandpaper around the sand block for a better grip) and start distressing it.
Use fine-grit sandpaper since coarse-grit sandpaper will leave uneven marks. While distressing, concentrate on the places that will experience natural wear and tear. Scrub until you achieve the desired distressed effect.
Painting Wood
Paint your wood with your favorite color. Make certain that the color contrasts with the foundation or original color of the wood. Allow at least a day for the paint to dry to achieve a smooth, distressed appearance.
If you are painting a previously oil-based surface, we recommend waiting at least four days for the paint to attach adequately to the surface. As previously mentioned, begin distressing.
3. Wet Paper Distressing
This is another technique that is very similar to the candle technique and can be a lot of fun and easy to pull off. If you don’t have a candle or Vaseline to create a distressed look, you can go for this technique. The only drawback of this trick is that it is going to take a little bit more time.
First, clean and prepare the wood. Tear up a piece of paper into small pieces. The tears should be irregular so that they look naturally distressed. Wet the paper tears by immersing each one in water and scattering them across the wood. Paint over the surface of the paper pieces while they are still wet.
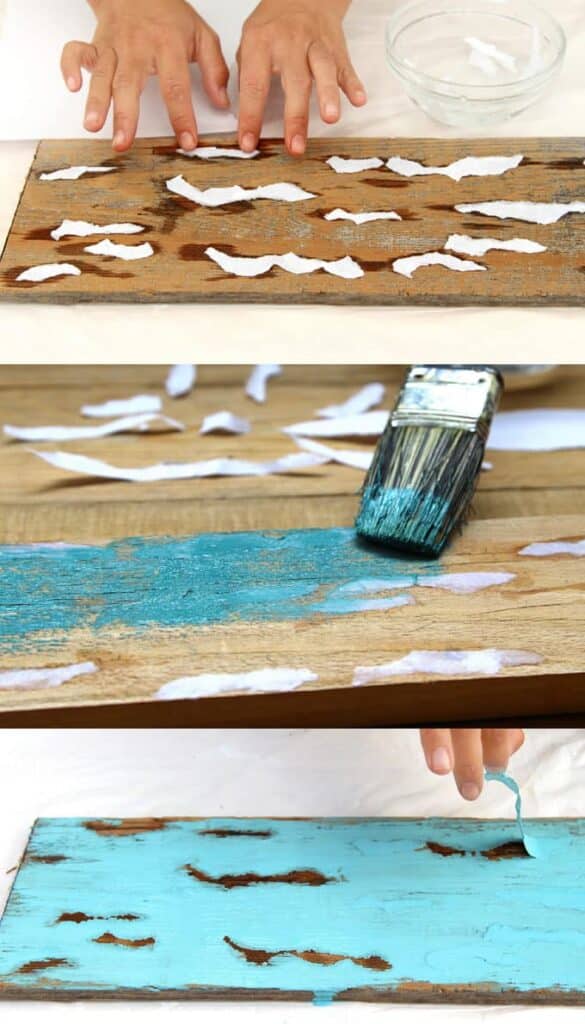
Lift up each piece of paper while the paint is still wet or dry. For quick and clean removal, we recommend removing it while the paint is still wet.
When the paint is dry, repeat the technique to achieve a layered, distressed look. To achieve a shabby impression, use highly uneven paper pieces on different portions of the wood each time.
4. Reverse Paint Distressing
This is a technique for distressing furniture without using sandpaper or waiting for the paint to dry to produce many layers. However, because reverse paint distressing is done with only paint, you will need some decent painting skills to master this technique. Let’s find out!
The name of this approach pretty much says it all. To achieve this look, you’ll need to use very thin coats of paint and dry brushing.
After prepping the furniture, use a combination of thin layers of paint using dry brushing techniques to create a distressed look. Basically, you need to paint thin layers of paint for a worn look.
But how do you dry brush? Don’t worry; we’ve got you covered!
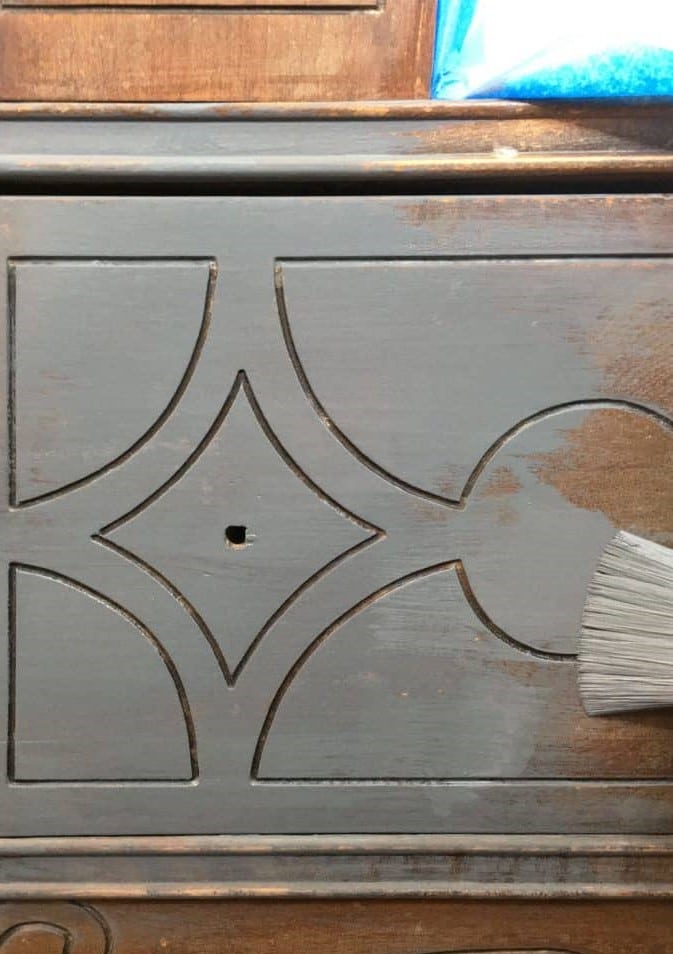
First, grab some paint and a brush. Apply paint to the brush and wipe away the majority of it using a paper towel. You should dry the brush by cleaning it so that just a small bit of paint remains on the bristles. Once you have this, begin painting on the furniture without applying any pressure, allowing the bristles of the brush to glide over it smoothly and lightly.
Cover huge areas with a paintbrush to make your job easier. To achieve a distressed look, paint in irregular strokes and patches; that’s all!
5. Natural Distressing
This is another method for distressing furniture that requires some painting skills. This technique utilizes numerous light coats of paint to get a layered and weathered appearance. Does that seem intimidating? Continue reading, and we’re confident you’ll be able to pull this off even as an armature.
The entire process is determined by the amount of paint on the brush and the degree of pressure applied to it. We will apply multiple layers of light coats during the procedure to achieve a distressed look. We will also ensure that some of the natural wood tones remain visible. Raised portions, edges, and corners of furniture are examples of regions that do not require full painting.
To begin, apply an unevenly thin coat of paint. The brush will be full of paint during the initial layer, but your brush strokes should be extremely light.
After the first layer of paint has dried, we will add the second layer. Now, dip your brush so that a third of the brush is wet with paint, but no paint is dripping out of the brush. Choose three random spots on your furniture where you want noteworthy coverage; we’ll refer to these as targeted areas.
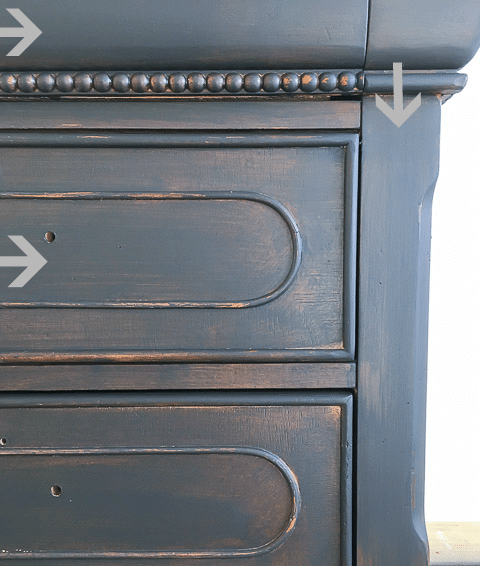
Apply medium pressure to the brush and paint the targeted regions completely and smoothly. When you’re finished with them, use the excess paint in the brush to paint the regions around the targeted places; we’ll need some base wood color to show through as well.
Now comes the easy part! Soak a rag in water and use it to wet distress along the edges and raised parts of the furniture where it will be naturally worn over time. Check out the image, where the arrow indicates where it is done.
Finally, take a step back and assess where blending is required. Take a tiny bit of paint on your brush and blend it gently with gentle pressure and lengthy strokes. The purpose of this step is to slightly fade the existing wood finish to make it look ideal. The finished product should resemble the image below.
So much for natural distressing!
6. Distressing with a Rinse
This is one of the simplest and quickest furniture-distressing processes, especially if you desire a country vibe. What we like best about this method is how simple it is and how the finished furniture will seem like soft, aged wood. We propose that you try this method for distressing raw wood furniture.
Let’s try distressing with a rinse!
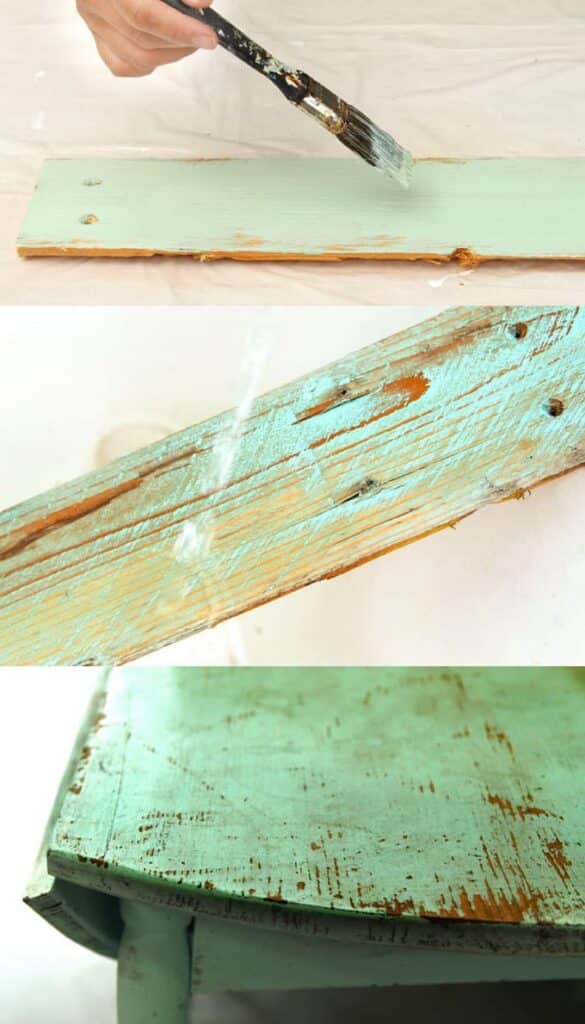
Paint the wood with your choice color, preferably one that contrasts with the wood, and let it dry for a few minutes. Before the paint dries fully, quickly rinse the wood with water and gently remove the paint from random areas with a rag. You only need to remove some paint from the surface. The end result will be adorable, aged Barnwood!
7. Distressing Using Wood Block
Distressing wood with wood—doesn’t that sound cool? This technique is simple and doesn’t involve much effort, but the end result is a chippy, distressed look for your furniture.
Let’s get started!
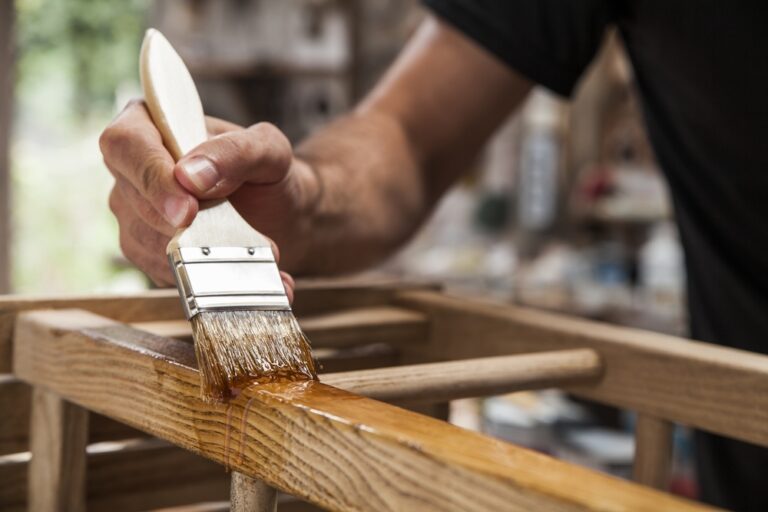
Take a piece of wood block and smooth and polish the edges to be used for this method. Paint the end of the wood block and smear it across the surface of your furniture. When dipping the wood block in paint, make sure that no excess paint drips out of it. We only want enough paint to create layers each time.
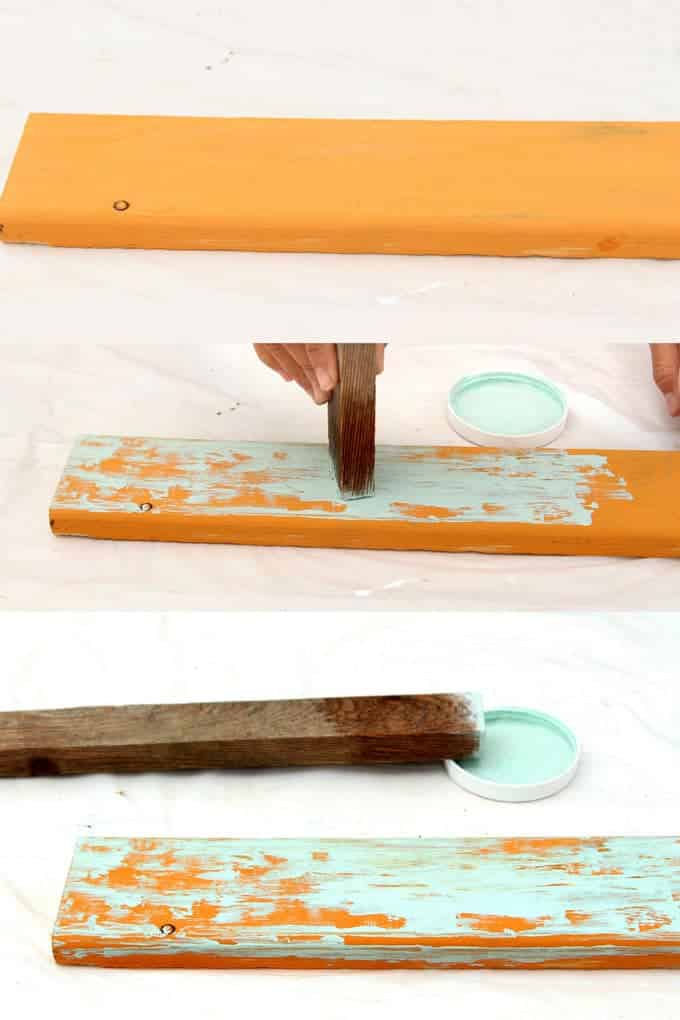
By dragging the wooden block in uneven spots, you can create multiple layers of paint. Allow the underlying wood to peep out for a rustic effect.
8. Double-Shade Distress with Chalk Paint
This distressing technique makes use of chalk paint, a brush, and clear wax. This method is ideal for making modern, chic wooden furniture for your house, and it can be a lot of fun to pull off. The use of chalk paint simplifies the process and results in a soft, polished look.
Choose two colors for distressing; if you want a delicate, modern style, choose tones that complement each other. Paint your furniture completely with the lighter of the two colors. Next, paint the darker of the two colors on top of it.
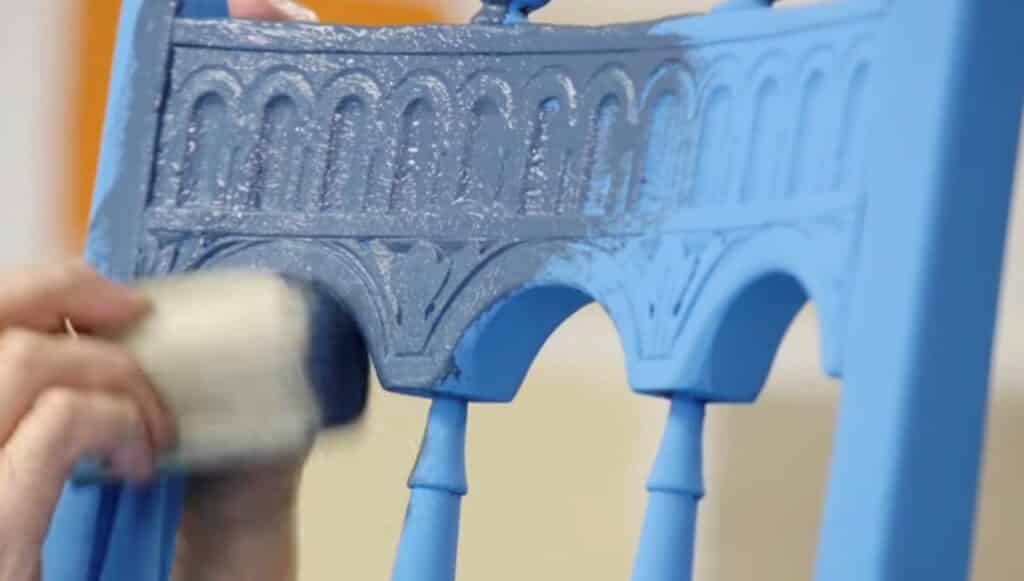
While painting, make sure to cover all of the furniture. Apply clear wax on the furniture using a brush, paying careful attention to the edges and higher sections. You can use a towel to remove any excess wax. While applying the wax, use gentle pressure and glide over the surface.
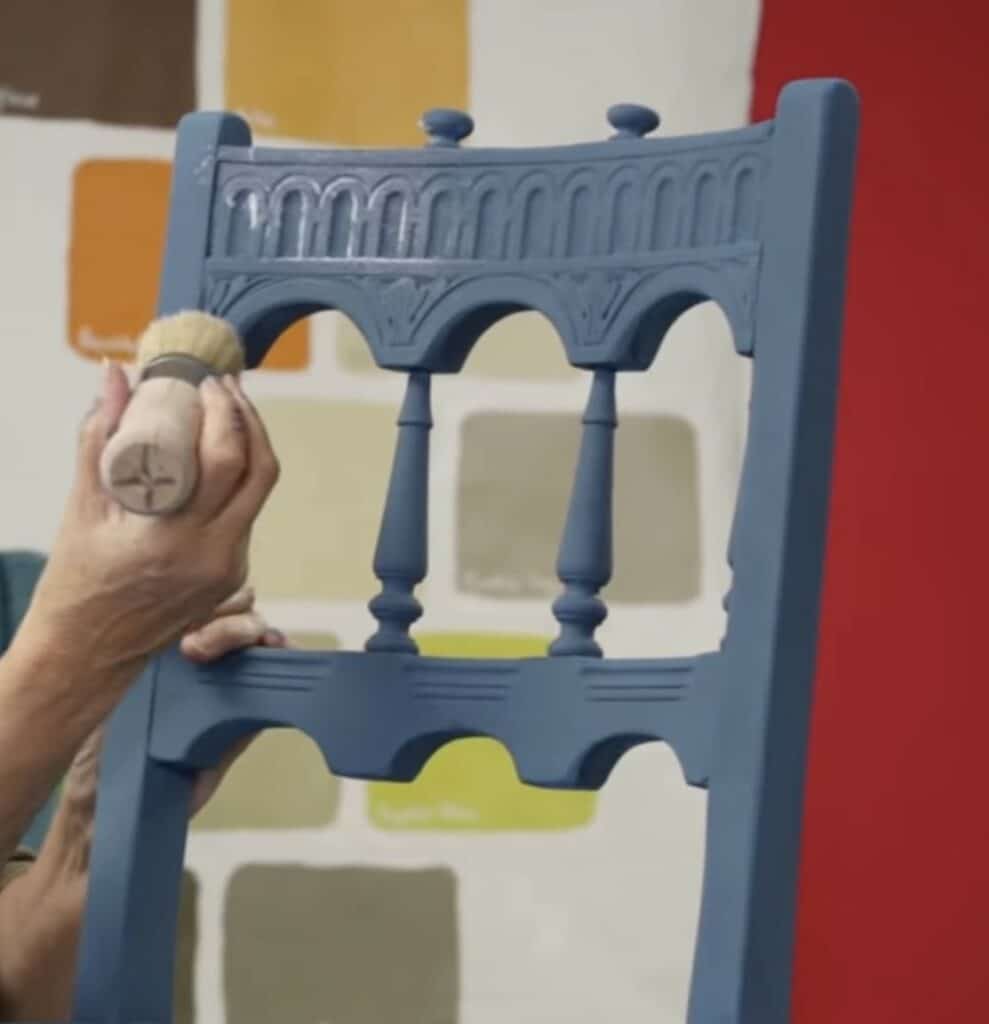
You will now require two types of sandpaper. They are medium and coarse. Start by scrubbing the furniture with medium sandpaper. Continue slowly, and gradually apply some pressure.
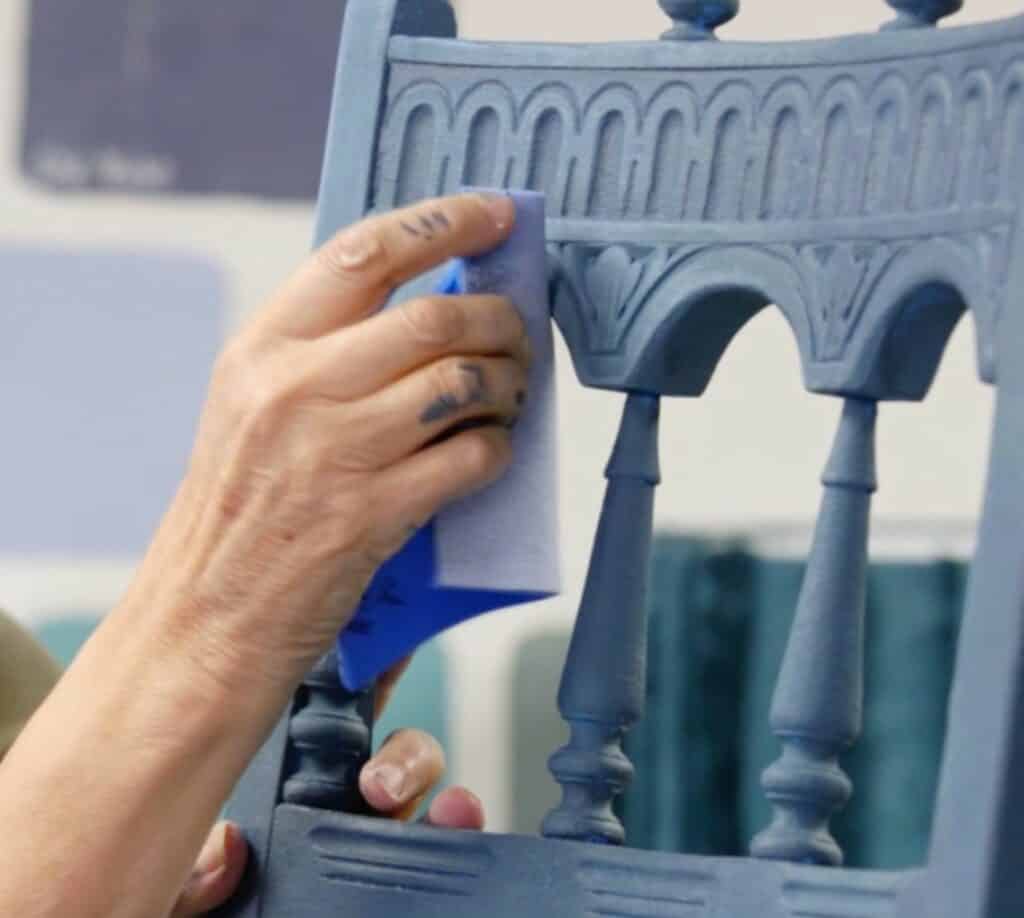
Now, using the coarse sandpaper, carefully scrub the same places until the lighter color begins to show through. If you want to add a couple of small rustic features, you can brush harder in areas such as edges to reveal the foundation wood.
After you have done scrubbing, it’s time for you to apply wax again! Just wax everywhere you sanded with a brush for a fine finish.
You can now take a step back and enjoy your work of art!
9. Crackle Paint Distressing
This is a terrific technique for giving the wood an aged appearance that seems hundreds of years old. So, if you want to add some serious distressing to your furniture, check out the crackling paint approach.
You’ll need a piece of wood, glue, and warm water. This distressing technique can be done with any paint, whether chalk paint or acrylic.
Choose a darker base color and paint it completely over the wood you want to distress. Allow the base coat to dry thoroughly. Now, add the accent color, which can be whatever shade you desire. Using a brush, smear the paint in uneven areas by gliding it.
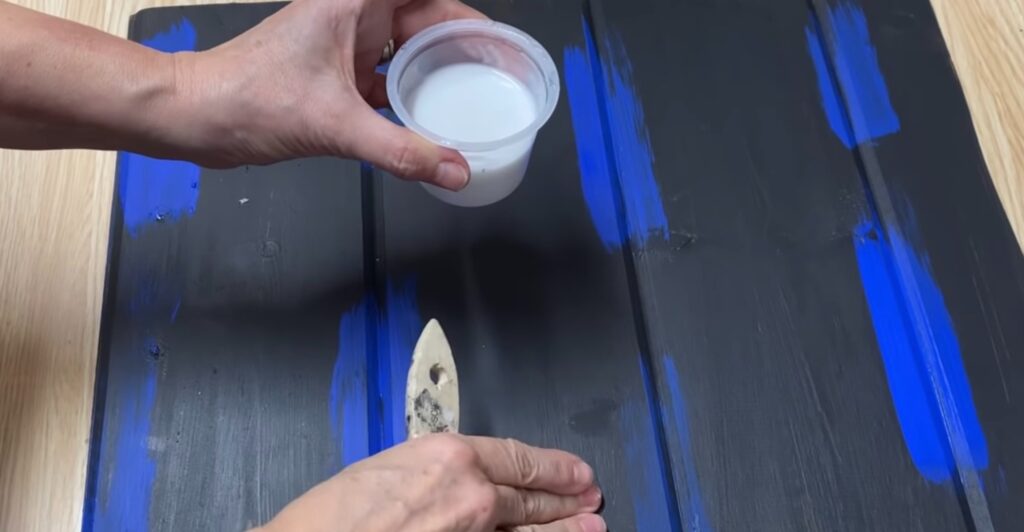
Now comes the most exciting part! In a jar, combine one part water and two parts adhesives. Our goal is to dilute the glue somewhat so that it flows smoothly.
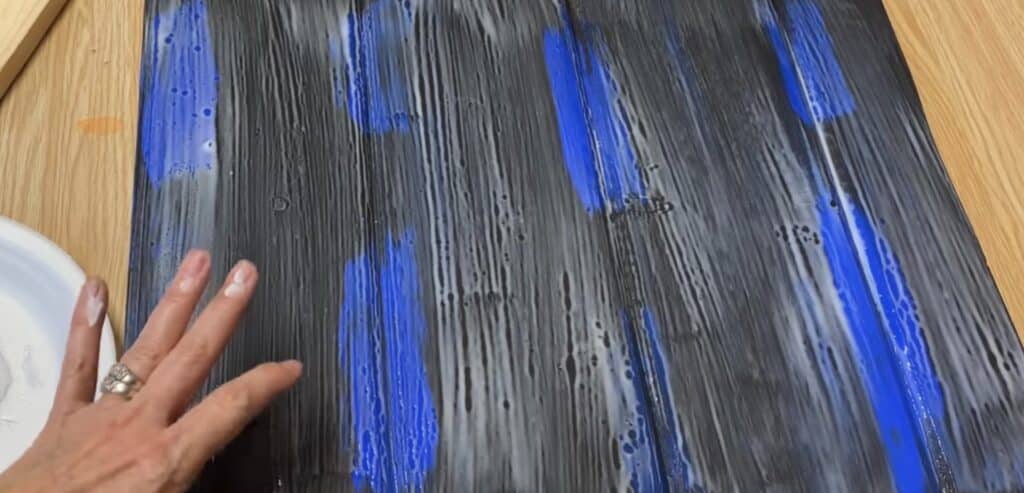
Take the water-glue mix and apply it all over the wood. Make sure to apply in thin layers to get maximum crackles. We recommend applying the glue in long, gentle strokes. After you have applied the glue, let it sit for five minutes.
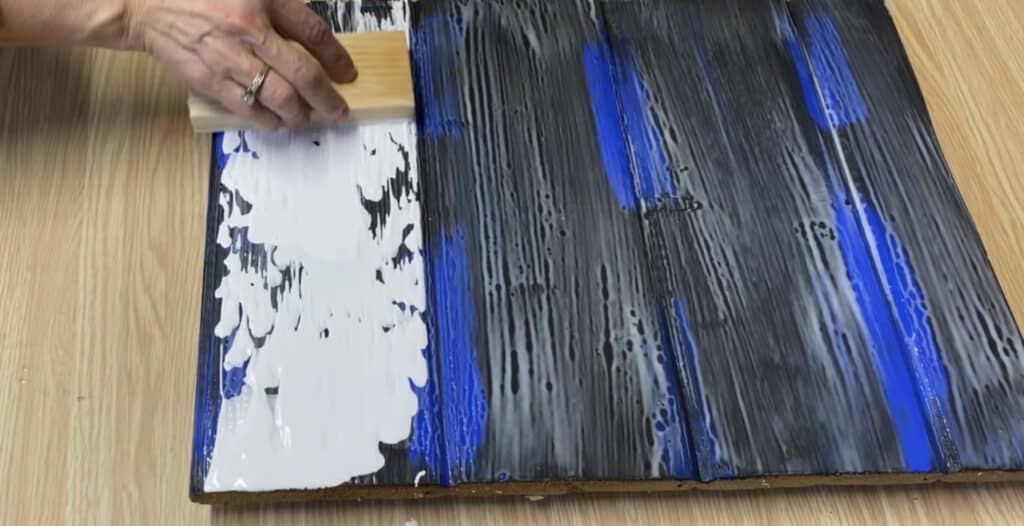
Now take some light paint in a tray and dip the wooden block in it. Now all you have to do is drag this block across the wood you want to distress. Let the paint dry, and let the glue do its magic!
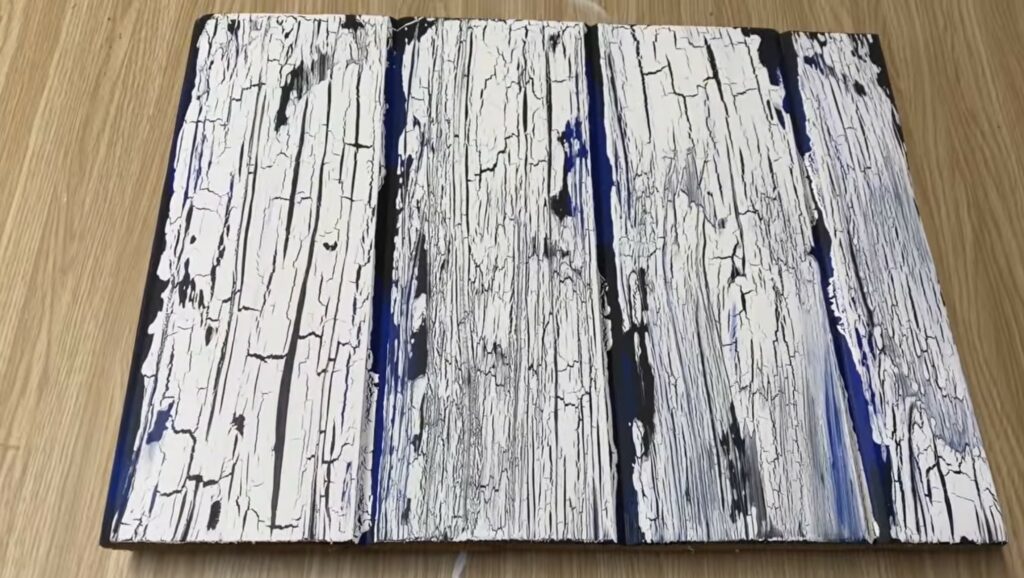
You will notice crackles when the paint dries. You can also use a blow dryer or a heat gun, but allowing air to do its work produces the greatest results. Take a look at how wonderful the wood appears today with the natural-looking crackles. Sand the edges as the final step. We recommend sanding firmly around the edges with 80-grit sandpaper.
The finished product will resemble truly aged wood.
10. Pouring Paint Distressing
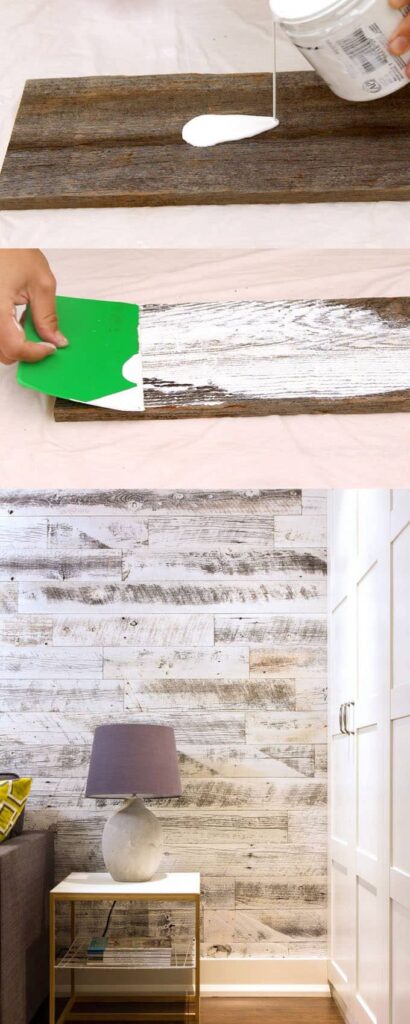
This last method is another one-step option for all you lazy doers looking to make fantastic bleached, aged barn wood!
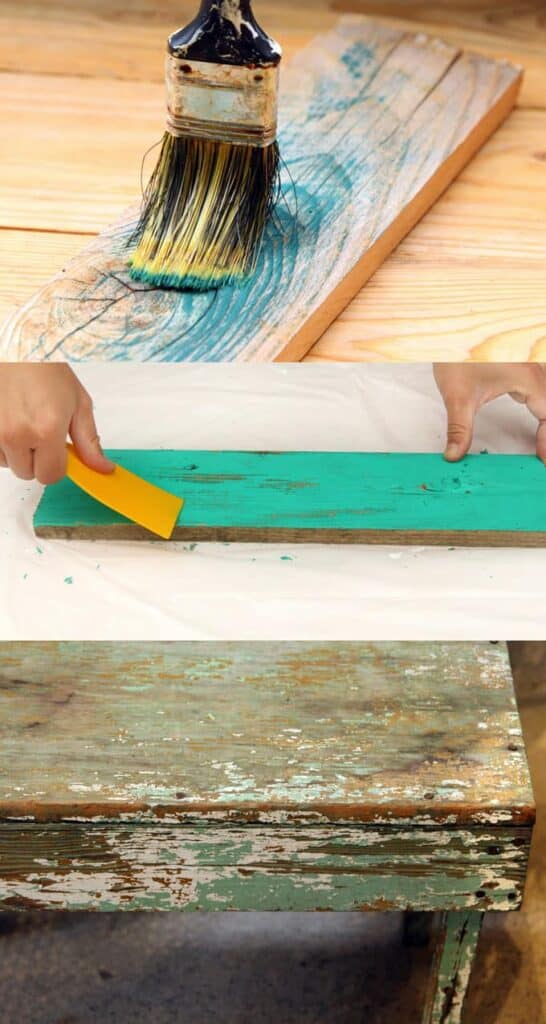
This technique works best with white on dark wood. Pour the diluted paint of your choice over the wood. Scrape along the direction of the wood grain with a scraper. We recommend using a scraper with a 120-grit rating. Finally, simply let it dry.
There you have it, old barn wood.
Wrapping Up!
So, we went over ten of the best furniture distressing techniques, and we are confident that you will be able to pull off any of them from our list. Each approach creates such distinct aesthetics, and we can all agree that they are fantastic!
The most significant thing is that you choose the approach that appears to be most exciting for you! Some of the approaches will need a significant amount of your time but trust us when we say they are well worth it.
Do you prefer distressing by painting or by doing a lot of handy work? Let us know which one you’re planning to try and how it turns out in the comments.
Stay creative!

