
10 Bedroom Furniture Painting Ideas to Inspire Your DIY Project
Painted furniture ideas are becoming popular these days to make your space look fresh and put together. Refreshing your furniture with a fresh coat of paint is one of the most budget-friendly ways to elevate your existing pieces.
It is also an easy DIY option, and with a few materials, you can give a new lease of life to your furniture. Bedrooms usually have lots of furniture items that can be given a redo quickly- think headboards, dressers, and side tables. Also, smaller pieces like bedroom furniture can be painted easily, and a fresh coat of paint can instantly elevate the look of the entire room.
Painting your own furniture and turning them around can not only be satisfying, but it is also a sustainable solution instead of thrashing and buying every time. We have put together a collection of painted furniture for your bedroom to inspire you to make the bedroom of your dreams.
There are simply no rules when it comes to getting creative, and let’s dive into some ways you can make your bedroom that focal point.
Supplies You Will Need for Painting Furniture
Process for Painting Furniture
Step 1: Prep the Surface
The most essential step to painting your furniture is to prep the surface. To begin with, remove all the hardware from the furniture piece. This will give you an even surface to work on without discoloring the hardware or getting paint splats on it. To prep the surface, the first step is to get in there and sand the surface. What we are looking for is to rough up the surface for the primer to hold. For this, you need to get rid of any surface finishes used on the furniture.
You can do this with a hand-electric sander or a sanding block and remove the finish on the furniture. Once done, wipe down thoroughly to remove the dust.
Step 2: Prime Your Furniture
Priming your furniture ensures that the paint actually adheres to the surface. For wood furniture, apply one coat of primer and let it dry completely. Roll a thick layer over the entire piece. If using a darker color paint, then get your primer tinted to a color a little lighter than your paint.
Pour some primer into your paint tray and use a foam roller to paint on the surfaces. Use a Zibra brush for tight corners and let it dry completely. Wait for an hour and apply a second coat of primer. Before going in with your first coat of paint, make sure there are no drips from the primer, and if there are, use a sanding block to smooth.
Step 3: Paint Your Furniture
Now your furniture is ready to be painted. Using a roller will give you a smoother finish. Once you are done, it is better to add a clear coat on furniture that will be high usage. And once finally done, it is time to reinstall the hardware which we had removed before the start of the process.
Let’s now look at some of the ideas for painting your bedroom furniture.
Ideas for Painting Bedroom Furniture
1. Use Bright, Earthy Colors
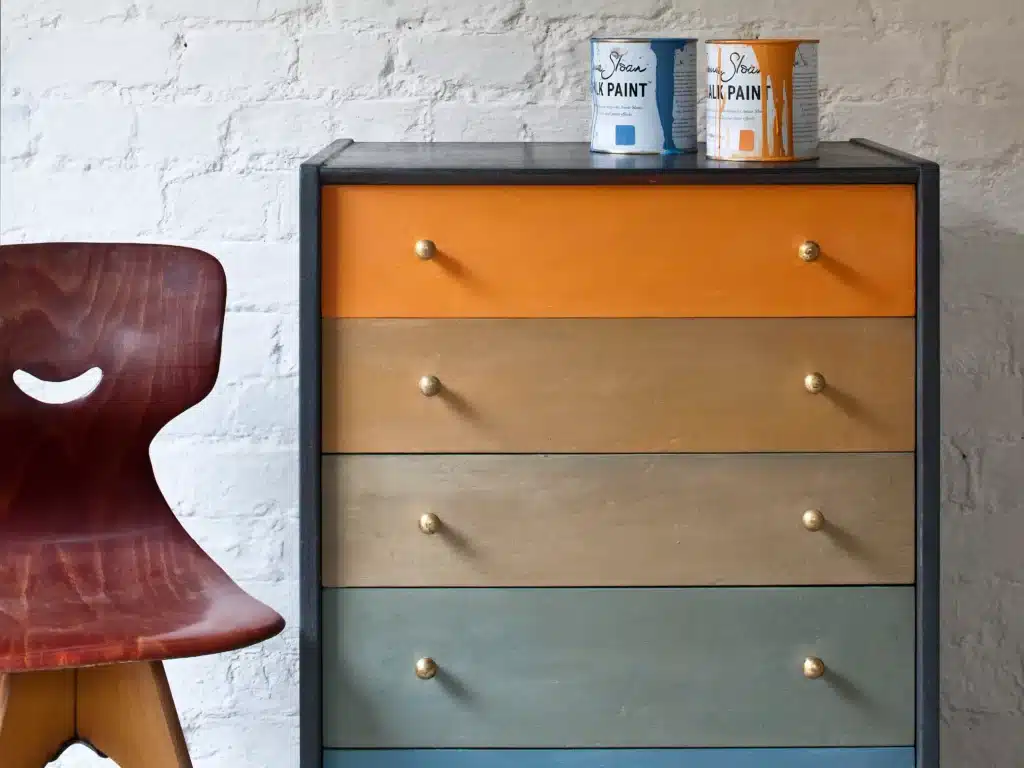
The love for a modern minimalist look notwithstanding, adding a pop of color to your room can instantly transform the focal point of the room. Painting your furniture piece in a bright, earthy tone like rust or orange can instantly brighten the room and make it the stand-out element. Don’t be afraid of trying out these colors, for when matched with neutral furnishings and muted-toned decor, they stand out and create a stunning visual aesthetic for the entire room.
2. Use a Rustic Finish
If you have an old piece of furniture, then instead of revamping it by painting over it completely, consider giving it a rustic look. The rustic look blends with most modern decor elements and is something you can DIY easily. Before giving the furniture a weathered look, make sure to clean and prep the surface thoroughly. Use your desired paint if you want your finished piece to look like it had been painted before; paint the furniture and let it dry completely.
Once completely dry, use steel wool and sandpaper to add the distress effect. If you are looking for a more rustic effect, use sandpaper to reveal the naked wood beneath. Before you finish the piece, clean it thoroughly. Pair this with neutral furnishings and earthy elements to make it a statement piece in your bedroom.
3. Paint the Hardware Too
Try to paint the hardware the same color as the rest of the piece to create a cohesive look. This not only looks simple but gives it a classic look. This kind of look works exceptionally well with simple round knob hardware rather than ornate metal ones. Choose to paint the furniture a darker shade against a neutral light background to create a stand-out look.
4. Statement Headboard
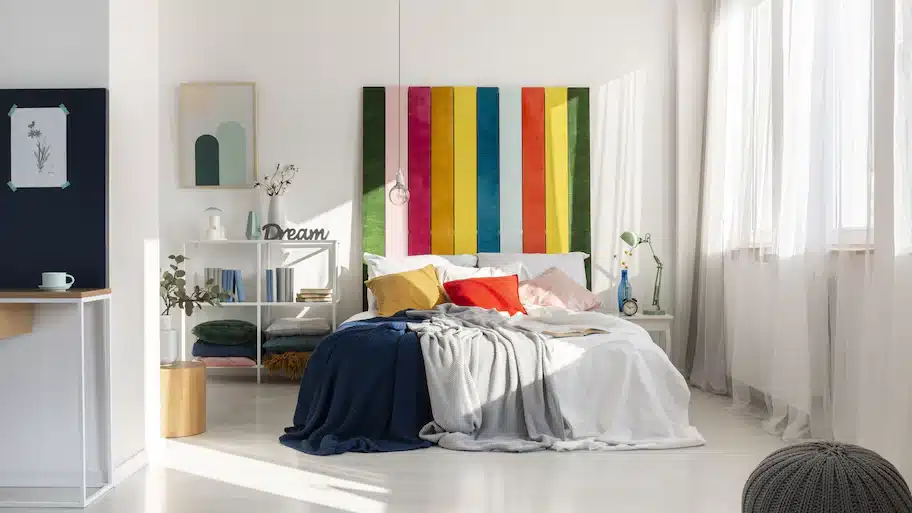
Swap your headboard for a swanky colorful painted addition to add a stunning element to your bedroom. Bright colors become a natural focal standpoint of the room, and this look can be easily recreated with some slatted board and colorful chalk paints.
5. Add a Hand-Painted Piece
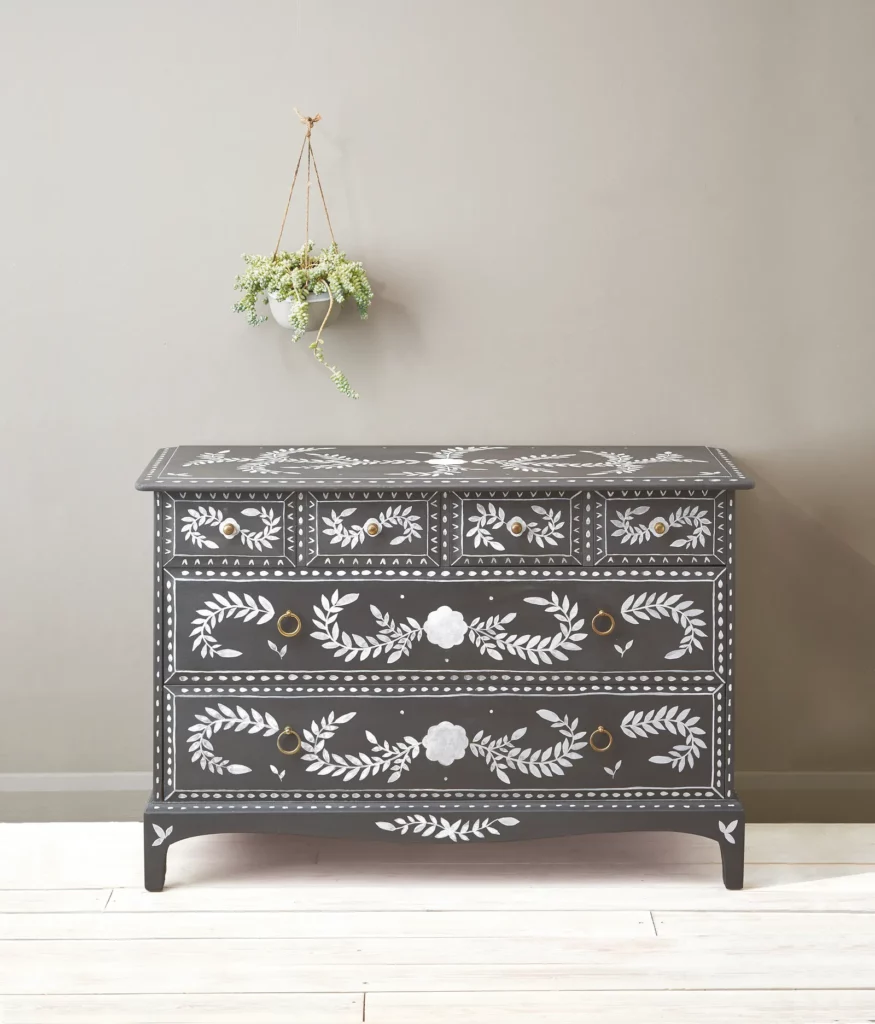
Handpainted pieces of furniture are always beautiful and add a delicate touch to the decor. This hand-painted design can be easily recreated using stencil designs over a painted piece of furniture. Use a lighter color paint or event mixed media paste to achieve a stunning, stenciled look. If freehand is your jam and something that you can pull off, going in with brushes and achieving this look can be quite simple indeed.
6. Revitalize an Antique Piece

Have an old antique piece of furniture lying around, or want to revitalize that old chest of drawers? Then reclaiming an old piece with a painting can be quite easy indeed. You don’t have to give away your family heirlooms; simply revamp them with a coat of paint to create a stunning look. You can choose to add some aged brass handles or hardware to stand out against the vintage look of the furniture. Colors like teal work are great when used with brass hardware.
7. Take Paint Beyond Furniture to The Walls

While painting furniture is a great idea, you could extend the same look to bring uniformity by extending the painted look to the walls as well. The wall color and the furniture color should ideally complement each other, and the color you pick for the furniture should be slightly darker than your wall color. The white of the bedside table is contrasted well with the wall color in this stunning bedroom.
8. Use Limewash

If you are someone who likes the minimalist aesthetic and is looking to add a time-worn look to their furniture, then look no further than limewashing. It is a great option for vintage pieces and lifting furniture that you want to give a rustic appeal. Limewashing is an affordable way to achieve a minimalist look, and it works great for upcycling your old furniture with a modern aesthetic. It is an easy DIY and with few materials, you can easily achieve this look.
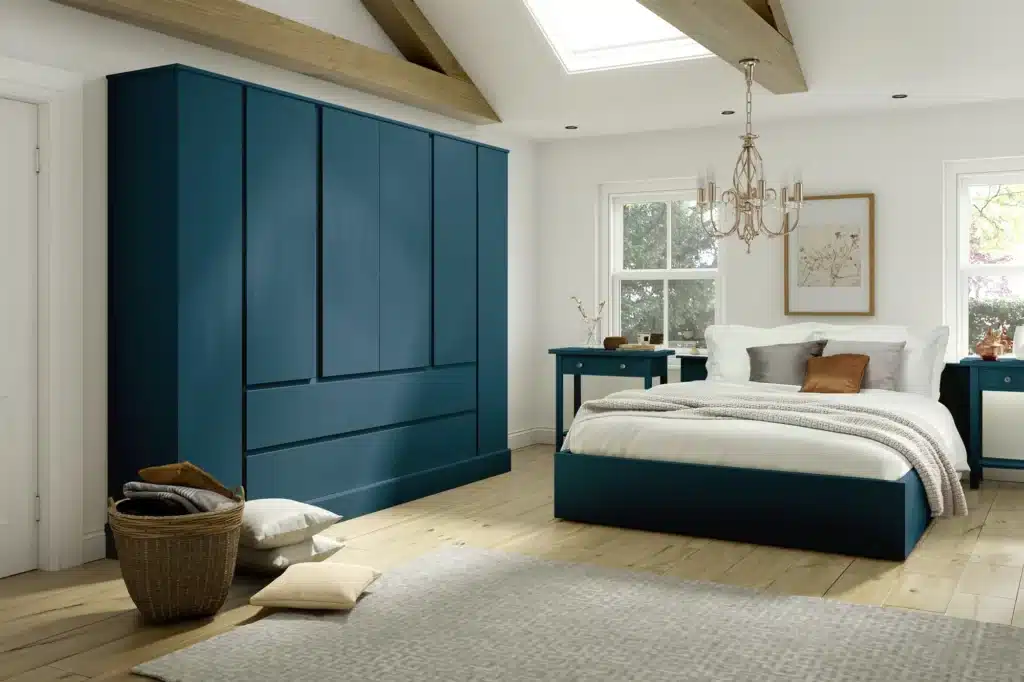
9. Painted Closet Ideas

Whether you are looking to revamp your existing closet or completely transform it, your closet colors can determine the entire look of your bedroom. You can choose to go neutrals or in monochromes or even bolder, darker shades- the choice is up to you.
Neutrals pair well with all kinds of decor and can be one of the safe choices for closets. If you are looking for bolder shades, then consider combining light and dark colors to create a stunning look.
Always make sure that your closet matches the rest of the decor and color scheme of the room. You want your closets to look stunning and not stand out for the wrong reasons.
10. Four Poster Painted Beds
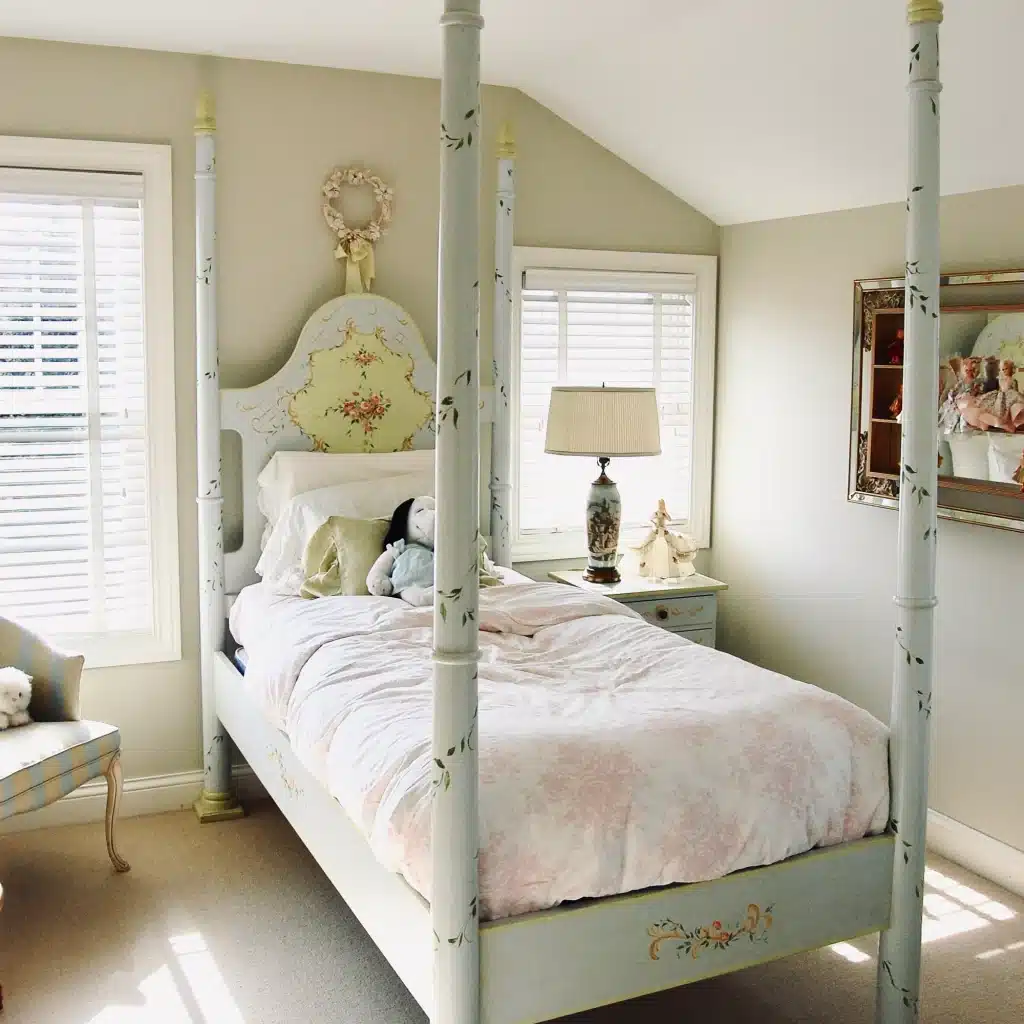
A four-poster bed can add a statement look to your bedroom. These stunning beds draw your eye upwards and create an illusion of height in the room. Painted poster beds with delicate paisleys, solid painted, or even stencil designs are all the rage. Regardless of the style, these four poster beds can be the focal element of your room. You can choose from pastels to create a feminine look or go bold with blacks, cherry reds, and navy for a bolder, more intense look.
Painting Your Bedroom Furniture
The wonderful thing about painted furniture is that it is an eternal favorite. You can DIY a piece multiple times to suit your needs, and if you change your mind, it’s as easy as sanding down and painting it again.
You can create a host of versatile looks with different materials, right from shiny pieces to vintage rustic looks to the post-modern aesthetic. We hope some of these ideas were useful if you are planning to do a makeover of your furniture for your bedroom.
So what are you waiting for? Get in there and get painting! Do tell us in the comments how it went and questions, if any!
Frequently Asked Questions
How Long Does it Take to Paint?
The actual painting might take you a few hours at the most. Most of your time will be spent waiting for the paint to dry. Your prep will mostly take longer than finishing the piece, so plan accordingly. This could easily be a weekend DIY project if planned perfectly.
How Many Coats of Paint Should I Apply?
For the best coverage, aim for at least two coats of paint and let the furniture dry completely between coats. You will ideally need two coats of primer and about two coats of actual paint before you start seeing the finished results.


