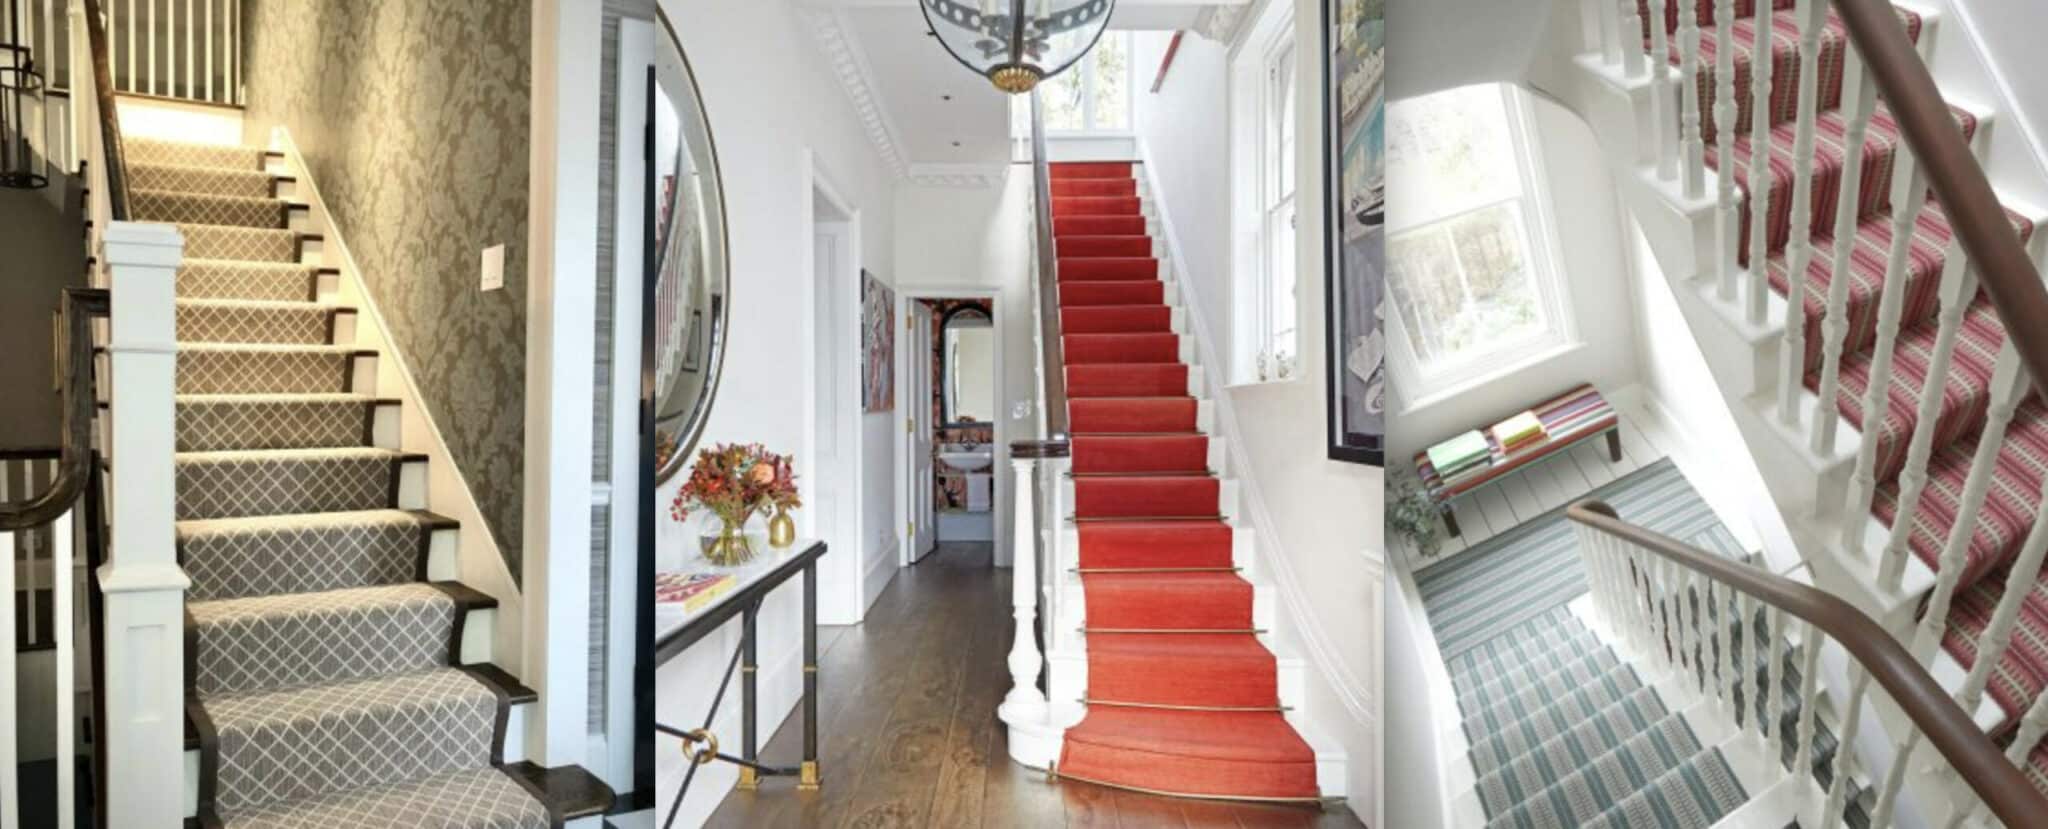
How to Make Staircase Runner [Complete Guide]
Looking for an easy DIY home project? Try this DIY staircase runner to give your place a visually interesting look and plenty of other benefits. Both interiors and exteriors of the house require regular maintenance even after renovation or purchasing a brand new home. Calling a professional for every small work can go out of budget.
There are certain home projects that can easily be DIY by newbies with minimal material. One of the elements in the house interior that is eye-catching and functional in nature is the staircase. Anyone entering your house will first see the staircase in the entryway and observe the color, pattern, material, handrail, and trim design. Another feature that adds aesthetic to the staircase and can be DIY by anyone at home is a staircase runner.
The main reason behind installing a staircase runner is to protect the stairs from scratches and damage and prevent people from slipping over the glossy stair tiles. The advantage of having a staircase runner is that it ensures the durability of the stair, and you can change the runner frequently for a whole new look.
What Materials Are Required for a DIY Staircase Runner?
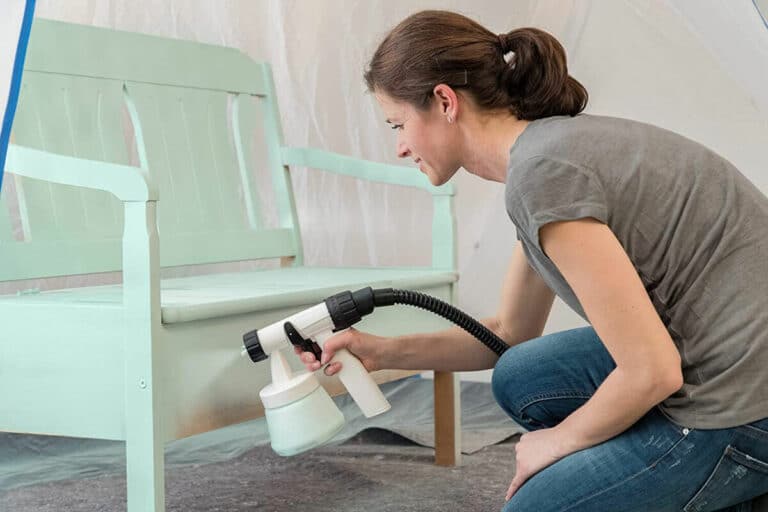
DIY staircase runner is a simple and effective project for the house. Not only does the staircase runner design look beautiful, but it also gives a warmer appeal on colder days. This DIY home project will turn out to be very beneficial for your interiors, as you will no longer be bothered by the footstep noises, and your staircase will not be damaged even if you move furniture up and down. Apart from this, once you know the technique of DIY staircase runners, you can replace the runners on special occasions like Christmas, Halloween, etc, for a festive look. Here are the materials and techniques that you’ll need for a DIY staircase runner at home.
- The first step for a DIY staircase runner is cleaning the hardwood stair surface and giving it a smooth finish. With the help of an orbital sander tool and the 120-grit sanding disc, sand the stair surface to remove all the dirt and grime because of the footfall.
- After sanding the staircase, in particular, the broad stair components called the treads and risers, you’ll get a whole new clean look to the staircase. The tread is the larger area of the staircase where we generally walk, and the risers are the elevation beneath the tread. As the staircase runner majorly covers these two regions, it is necessary to sand them.
- Sanding the stair components before installing a staircase runner is necessary as it will open the wood fibers to accept the oil finish and wood filler effectively.
- To cover the nail holes on the staircase, first, apply a layer of oil finish. Allow the finish to dry, and then apply wood filler with a brush. By following this pattern, you can avoid unwanted spots of wood putty that don’t match the rest of the wood tones.
- After the wood filler has been applied, wipe away the excess with a damp rag, as this material helps remove the wood filler effectively. Later on, allow the wood filler to harden.
- You can choose to apply a second coat on the nail holes with more stain or finish. This will make the wood tone differences between the fillers and the original wood a lot less noticeable.
- Move ahead by applying hardwood flooring oil finish on the stairs. This is an easy application and is durable in nature. The oil finish comes in two parts; the oil portion and the accelerator portion.
- Mix the oil and accelerator portion in a 3:1 ratio and spread it on the stair surface. Allow it to penetrate and mix well with the wood fibers for a few minutes, and then wipe off the excess with a soft cloth. Allow the finish to dry overnight before installing the staircase runner.
- Meanwhile, give the risers are new look by painting them with a neutral color like white, beige, etc., that works well with the staircase runner pattern. Apply two coats on the outer edges of the staircase, as the middle portion will be covered with a staircase runner.
How to Install a DIY Staircase Runner?
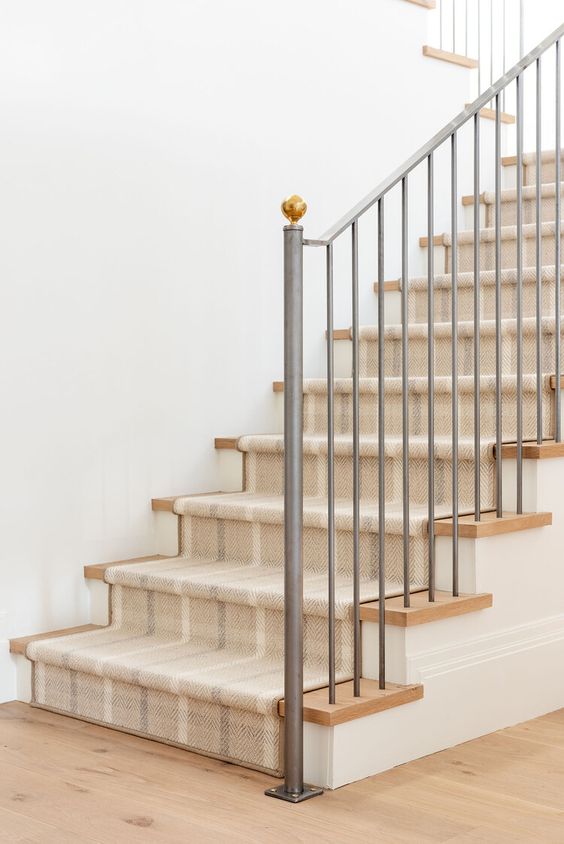
DIY staircase runner is one of the most cost-effective and easy home projects one can consider when thinking of a new look on the staircase. A staircase runner adds character and visual interest to the stairs making them the focal point of the house. The most important factor while shortlisting a runner is its material. You should always consider the footfall and categories like pets, kids, etc., that will be accessing the staircase.
There are two styles of runners that you can select for a DIY staircase runner; a customized runner that runs from wall to wall or a pre-made runner that is installed in the middle of the staircase. If you want a durable staircase runner, consider installing a synthetic nylon runner, as it has a soft surface and is easy to maintain.
Apart from this, you can consider installing woolen staircase runners if you live in a colder climate. The woolen material will not only give a natural touch to the staircase but will last for several years, and the fibers are dirt and stain resistant.
Here is an easy way to install a DIY staircase runner in a hassle-free manner.
- After you have measured the width of the stairs with a measuring tape, order a staircase runner rug that will elevate your hallway and blend easily with the rest of the interiors.
- Usually, a standard staircase requires a 26-inch width runner rug. This covers the stair tiles effectively and gives the entire staircase a plush look.
- For proper installation, place the staircase runner all the way up to the corner and then take the measurement of the area which the runner does not cover, i.e., the uncovered stair.
- After this, split the difference on both sides and place the runner accordingly. This means if the uncovered stair is 10 cm, leave 5 cm on each side of the stair, and that becomes the area where you’ll be installing the staircase runner.
- With the help of the painter’s tape, mark the measurements on the side of the stair so that the staircase runner can be installed straight and in the center.
- If you want to experience a softer touch apart from the staircase runner, you can consider placing rug pads beneath the runners. You have to cut them to the size of the stair treads, as they’ll be installed individually. With the help of a pneumatic staple gun, attach each rug pad to the treads.
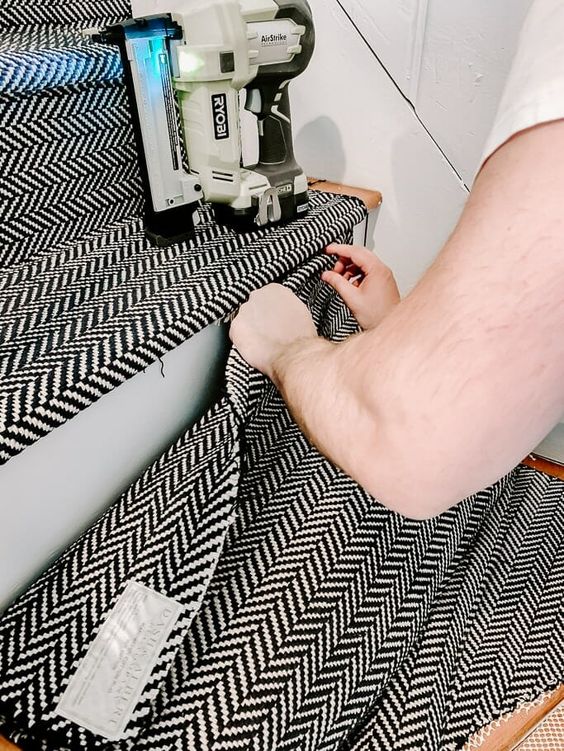
- Now, you can begin installing the staircase runners. It is advisable to start from the top to bottom manner. With the help of a staple gun, attach the staircase runner at the joint where the tread meets the riser and the stair edges. Keep a distance of 3 inches between each staple.
- With this method of installing a staircase runner, you get a tailored-tucked view, which is crisp and elegant. With the help of a painter’s tool, you can tuck the runner intact and tight, which in turn reduces the chance of slipping or falling over.
- For holding the staircase runner in place and giving additional support, you can consider using metal or brass rods and finials. With the help of a pipe cutter, cut the rods to the required length and then attach them with screws on the stairs.
- These rods are for decorative purposes and add a finishing touch to the staircase runner. They add an extra level of elegance to the staircase because of their rich, matte color.
- There will be at least 2 to 3 rolls of staircase runner rugs used in this DIY project. Make sure you attach the borders seamlessly so it looks like one entire rug.
How Many Types of Staircase Runners Are There?
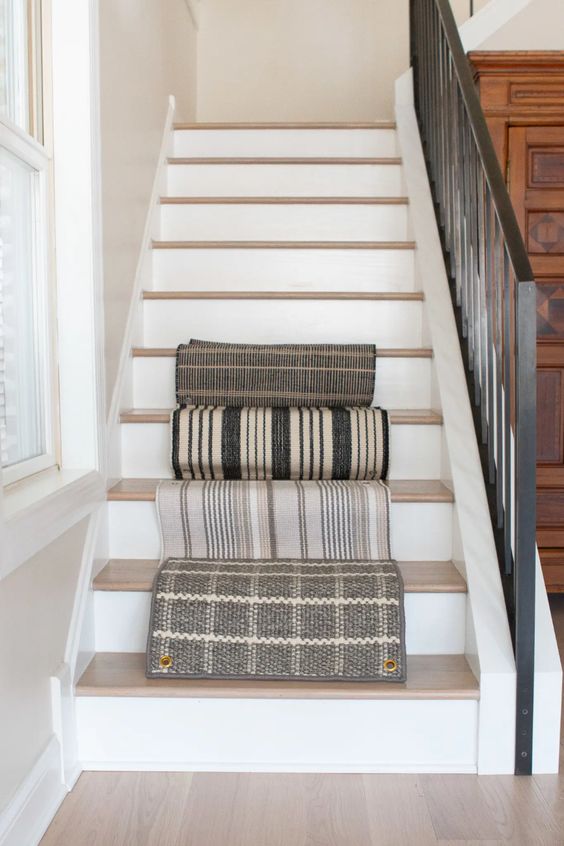
Staircase runners are a perfect way to convert your hallway into a statement. These runners can give a vintage touch, a modern touch, casual touch, or a rich touch to the stairs in an easy DIY staircase runner project. Runners come in different patterns, materials, and colors that blend easily with your current interior. Besides this, you can be creative by using bold colors or printed runner rugs to create a focal point.
Staircase runners are made up of cozy and durable material and will remain functional and trendy for several years. By taking a DIY staircase runner project, you not only have an advantage of an economically friendly project but also get to increase your skills and know about different materials and colors that will work well in your interior.
Here is a compilation of the types, trends, and designs that you can consider for your DIY staircase runner.
1. Hollywood Staircase Runner
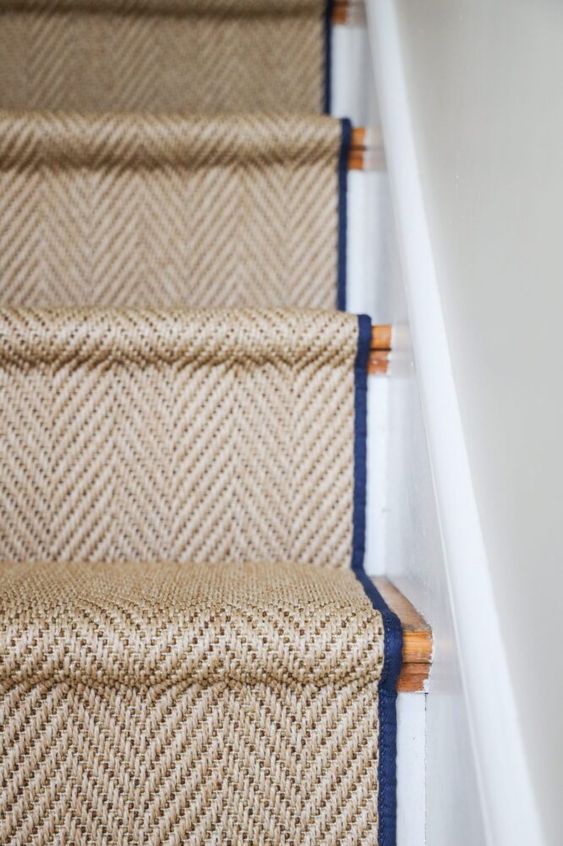
Also known as French capped staircase runner, this method gives the stairs a tight and tailored look. The runner rug is measured and installed from the top down manner with staples.
For a compact look, the rug is stapled to the stair nose or edge along with the treads. Although installing this kind of staircase runner takes up more carpet and time, the end results are visually interesting and make the staircase look beautiful.
As this staircase runner has a crisp look, you can choose the runner rug to have a solid color like red or a neutral color like gray or brown.
Apart from this, the texture of the staircase runners also acts as an accent and can elevate the look of the stairs. You can consider a plant fiber runner like a jute runner, a bamboo-styled runner for a visually interesting look, or can choose a runner with minimum patterns like stripes. This DIY staircase runner will blend with all kinds of interiors like modern, traditional, etc.
2. Waterfall Staircase Runner
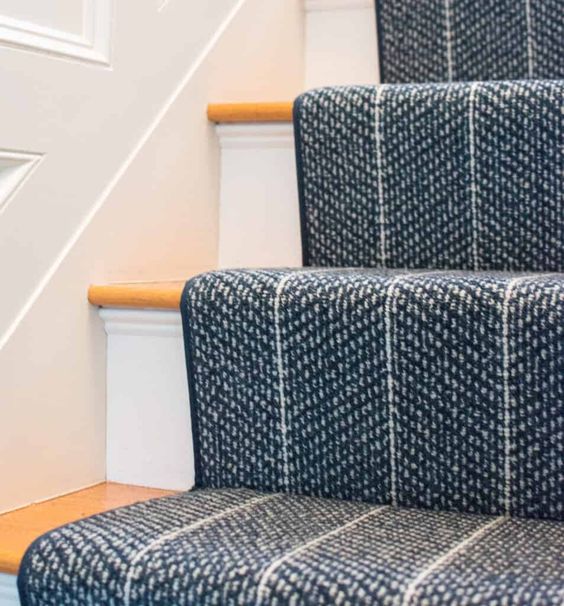
This type of staircase runner gives the stairs a seamless look. You install the runner rug with the same technique, the difference is that the rug is no longer stapled to the stair nose or edge, and the tread is directly attached to the riser, giving it a casual look.
You can add metal or brass rods and finials for additional support and elegance on the staircase.
You can consider colors like navy blue, dark grey, and other bold colors for staircase runners in this model. Along with these shades, pair them with black borders or stripes for a visually appealing look. For transforming your staircase runner into a focal point, you can equip the stair curves with decor items and use the vertical space for creating a wall of frames.
Apart from this, you can create layers in the staircase runners by selecting different patterns and colors on every floor. This makes the staircase look creative and colorful. You can also choose a staircase runner that has the same color as the stair tiles and railing to make it look more plush and traditional.
3. Staircase Treads
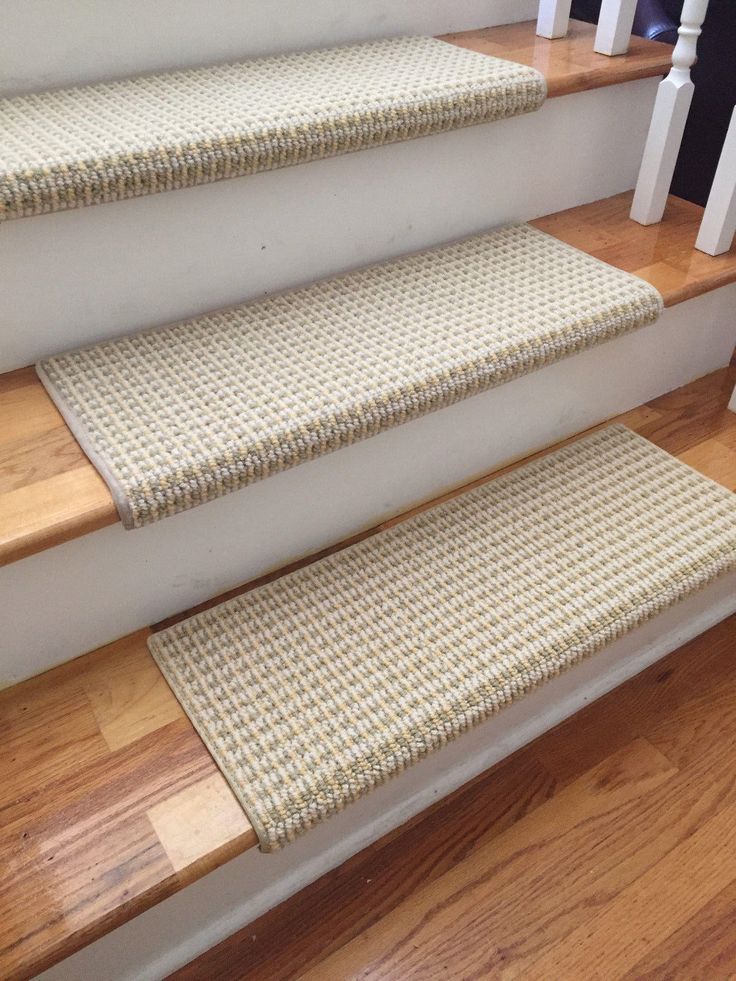
The purpose of doing a DIY staircase runner at home is to make the stairs look beautiful and protect them from wearing. A simpler method to give the staircase an elegant touch in less time is by attaching staircase treads. This method involves attaching small rectangular pieces of carpet or rugs to the stair, specifically the treads.
That’s why it is called the staircase tread or carpet stair tread. These rugs come in a standard size, or you can cut them as per your requirement. You can staple them by placing them horizontally to the treads, or many of these come with self-adhesive. For a visually appealing look, you can wrap the rug around the stair nose and staple it.
This makes the stair tread visible from a distance and protects the stairs too.
Conclusion
One of the most functional pieces of the interior is the staircase. They are constantly in contact with dirt, mud, stains, and spills. Although the wooden surface can be cleaned easily and gives a rustic look, over a period of time, it needs maintenance. You cannot change the entire staircase or stair tiles; this will not only spoil the structure but also break your bank.
Staircase runners can prove to be fruitful in protecting the hardwood and transforming the place with a fresher look, keeping it economical. DIY a staircase runner can be done with minimal material, single-handedly, and in no time. Staircase runners are the perfect way to make a design statement for the entire house and provide new functionality to the space.
These runners help provide grip on each tread or stair and reduce the chance of slipping or falling, which is essential for households full of kids, pets, and the elderly.

