
5 Easy Steps to Install Outside Lights on House Effortlessly
Lights make everything bright! Having outside lights on a house can drastically beautify the exterior after sunset. Installing them also enhances security and safety. However, most homes only have a light near the front door. They help in entering and leaving the house in the dark. A DIY outdoor landscape lighting is a unique way to experiment and create a beautiful pattern for your garden.
Creating a pattern and installing the lights might seem like a long process, but this article makes it easy. It will help you understand the different types of lights and the installation process for each. Also, get guidance on how to select an appropriate light for your landscape.
So, are you ready to make your house stand out in your lane?
The first and foremost step is to find an appropriate space to install the lights. Outdoor lighting has the potential to highlight many features of a home. It can be a walkway, a flower bed, a unique plant, or an outdoor decor item. Considering an architectural overview, find the spots that will enhance the beauty of your exterior through lighting. There can be multiple reasons for you to have outside lights on the house. If you are placing lights for safety, arrange them in a way that creates curb appeal. Once you decide on the location to install lights, determine the size of the lights. Having an appropriate amount of brightness is a crucial factor. Too much light can blind the viewer, and too small will go unnoticed. The last and most impactful factor is choosing a suitable color. Some of the best options for outdoor lighting include warm white, very-warm white, cool white, and natural white. The word ‘warmer’ and ‘cooler’ refer to the brightness of lights. The ‘cool’ refers to a light shade, whereas ‘warm’ is mild. Cooler lights are brighter in comparison to warmer lights. While deciding on the outside lights on the house, consider the final impact you want on your eyes when you view the garden. Excessive brightness can feel harsh in the dark. However, if you are installing lights for security, it ought to be brighter. You can use a warm tone to highlight the beauty of your garden’s stonework, flowers, or bench. After deciding the location, size, and color, it’s time to select the type of light you want to use. When it comes to landscape lighting, there are three main types of lights. The placement of outside lights on a house of any kind looks beautiful. However, it’s better to know the functioning. Let us understand each one of them in detail. As the name suggests, solar-powered lighting depends on sunlight to operate. It is easiest to install and recharges by itself in the presence of the sun. Such lights have an in-built panel that captures the light, photocells to sense the darkness, and batteries that retain the charge for a few hours. Multiple solar lights can also share a solar panel, wherein the lights remain connected to the large panel. Outside lights on houses with solar power can highlight the farther corner of your space. They can shine in any location of your home. The only prerequisite is that part of the landscape should receive proper sunlight. This light only works in sunny areas and can fade out without sunlight. They are also dim compared to other lighting options. Low-voltage lighting provides a consistent glow with timer scheduling. It receives power through a transformer plugged into an outdoor GFCI outlet. It stands for a Ground Fault Circuit Interrupter. It is a device installed in the electrical systems or built into a power cord for protection from electrical shocks. The transformer steps down the power and allows an attached table to extend throughout the yard. The timer in this lighting allows efficient use of energy. The lights only extend up to the distance of a cable. Passing the wiring through the landscape and hiding it underground can become tedious. Choose this lighting if you want consistent brightness and don’t have a vast distance to cover. These lights shine brighter compared to solar-powered lights. While installing this lighting, you might need the help of a professional. They are difficult to install and require special materials. It is hard to relocate them after installation. It is the best option if you wish to keep the landscape for years. Once you have selected the type of lights you want to install, it’s time to plan out your design. If you don’t design, wouldn’t all the hard work of installing lights go in vain? They should bring out the beauty of your landscape and enhance your exterior. Here are a few creative lighting techniques for placing outside lights on the house. The creative techniques you use for lighting your landscape will determine the quality of your outcome. Lighting techniques can convert a simple house garden into a heavenly abode. Use appropriate placements at different spots and feature the most noteworthy aspects of your garden through lights. The installation process for outside lights on the house differs with the type of lights. This step solely focuses on understanding how to install different types of light in your landscape. Go through each procedure and decide which one is the best and easier to install for your space. The first step is to insert batteries in your light if they do not have non-removable batteries. In a chosen location that gets maximum sunlight, install the solar panel. Keep in mind that the last light in the series has to be connected to the panel. After finding the location, insert the solar panel in a way that it is tilted towards the direction of the sun. Begin to place the lights at a suitable distance along the area of your wish. The distance can be from 1 to 2 feet. Install the lights facing the sun and attach them as per the system. Read your lights’ instructions to understand the cable connections with solar panels and in-between the lights. Once the arrangement is intact, turn on the systems and let the batteries charge through the sun. Always keep the surface of the solar panel clean by wiping it with a damp cloth and mild soap. Go for replaceable batteries instead of rechargeable ones. Solar-powered lighting for your landscape can be tall, grounded, or with a wider design. When you get a low-voltage lighting system, they normally provide a transformer that converts the 120V into 12V for landscape lighting. Getting a transformer with a higher watt means you can attach more lights to the cable. As per the manufacturer’s instruction, install the transformer in a location that is near the GFCI outlet. Assure that the transformer is within 6 feet of distance from GFCI. Unwind the cable and the lights to place them at the places where you want them to be installed. Make sure to keep a distance of 18 inches between two lights. Dig a 3 inches deep trench throughout the pathway to bury the cable. Place the cable in the soil, but do not bury it. Let the upper surface remain open. Pound stake into the ground at decided locations. Connect the lights to the cable as per the instructions given in the manual. Once installed, place the lights on the stake. Connect the cable to the transformer after placing all the lights on stake. Test the system after the whole process to check the passing of current through all lights. Be careful as you work with a transformer. The low voltage is only limited to the buried cable. The transformer has high power running within. You will need a subpanel or L-body conduit fitting for line voltage lighting. Dig a 6-18 inches deep trench if using a conduit and 24 inches in case of UF outdoor direct burial wire. Now is the time to create the light mounting posts depending on the type of light you wish to install. In the case of conduit, add ½ inch PVC conduit with 90-degree bends to bring the wire to individual lights. While using UF wire, a protective conduit is necessary for safety. Run a fish tape through the conduit from one opening to the next available opening. Fish wire is a tool used by electricians for pulling electrical wires through conduits. Attach individual wires at the end of fish tape and pull through the conduit. Now attach the lights to the boxes and tightly screw them into place. Cover up the trench once the installation process completes. Line Voltage Lighting is normally installed by a professional. Unlike low-voltage lighting, the installation kit for this lighting is not easily available. To get these outside lights on the house, work with a certified electrician and be safe during the process. Once you install the lights, it’s time to check! Turn the power on and walk around the areas where the lights have been installed. With the assistance of an electrical inspector, carry out the process of wiring inspection. Once the arrangement passes the inspection and is marked as safe, it’s time to bury the cable. As you bury the cable, observe whether the lights remain on. If any lights turn off as you bury the cable, the connection needs some kind of adjustment. Make amendments to the connection and tighten the loosened cables. Once the lights are on despite the wiring being buried, you have completed the process. Enjoy the lights in your landscape. The excitement of having a new bright landscape can bring enthusiasm for doing it yourself. Although the process of installing outside lights on a house is neatly explained here, do take help. Unless you hold knowledge and experience in the field of electricity, you will need a little guidance and support from a professional while working with line voltage lighting. The new landscape with bright lights will leave you in awe every day you walk around your home. Enjoy the welcoming lights at dusk in your garden, and keep adding new ones if you need to.1. Understanding the Basics to Put Outside Lights on House

2. Select the Type of Light You Want to Use
Solar Powered Lighting

Low-Voltage Lighting

Line Voltage Lighting

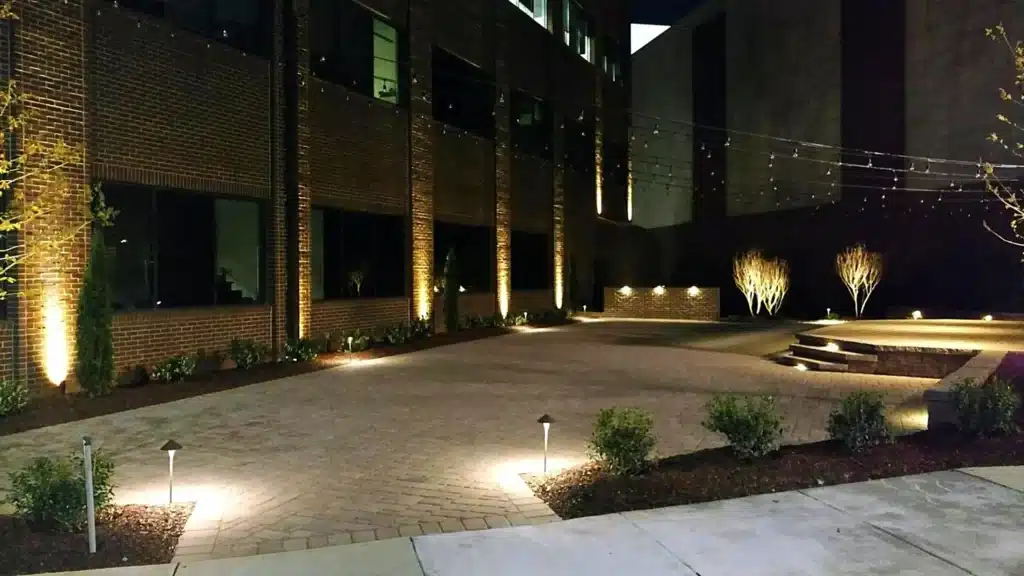
3. Designing the Landscape Lighting with Creative Techniques
4. Installing the Lighting

Solar Powered Lighting
Low-Voltage Lighting
Line Voltage Lighting
5. Testing the Lighting


