
What is the Ideal Way To Paint Oak Cabinets And Hide Wood Grain
Are you going to paint oak cabinets but want to know how to hide wood grain? Don’t worry; we have got you covered. We will provide a step-by-step guide on painting an oak cabinet while hiding grain.
The oak cabinet is a timeless furniture item that is more durable and has a longer life than furniture made of other woods. Its sturdiness is one major advantage that makes it worth repainting. Another aspect that makes painting an Oak cabinet is its cost efficiency. Rather than investing in a new cabinet, you can repaint the current oak one and save significantly. However, painting without following some steps could leave some grains unhidden. The steps mentioned in this blog will help you achieve a perfectly painted oak cabinet.
Let’s not beat around the bush and learn the steps for painting an oak tree without letting grains be exposed.
Gather Essential Materials and Tools For Painting and Hiding Grain
Specific tools are essential for each project we take into account. There would be some necessary materials and tools that will make painting and other steps easy for you.
Items for Filling Grains
Since this post is about hiding grains on oak cabinets, this is why we are mentioning this material first.
1. Spackle
The first and foremost thing to take into consideration would be sparkle. You can also choose a joint compound, wood putty, or wood filler if you have it in your inventory and save some bucks, but it can make your project lengthy since it dries late compared to sparkle.

2. Putty Knife
You will need a 3” putty knife to fill up the grains.

3. Sandpaper
An 80-grit sandpaper will be needed for the initial touch-up around the frames, and 220 grit for final perfection.

4. Protective Gear

While you indulge in the oak painting project, it is best to take safety measures. Here are some safety products you must purchase:
Materials Needed for Painting
Painting tools and materials will be required in the final step (after you will have prepared the cabinet completely). However, it would be best if you gather the following materials so that you do not have to run in between completing the project:

- You require a paintbrush to provide your oak cabinet with a premium finish. In contrast, a foam roller will be handy to smoothen the wood surface.
- A layer of primer will provide a smoother surface for the paint coat.
- Consider investing in painter’s tape if you want to paint the cabinet in multiple colors.
- Cleaning is critical while painting a furnishing item like an oak cabinet. Bring a cleaning cloth, and we are ready to start the project.
1. De-assemble the Cabinet
It is a crucial and lengthy procedure. However, it must be done in order to keep the finish look flawless. Removing the drawers must be done with complete focus since you want to make sure the whole process of reviving the cabinet is maintained.

Unscrew the screws to remove the doors and drawers. Additionally, refrain from hurting the wood while unscrewing the hinges that are holding them together. Keep the removed hardware in a moisture-free place; otherwise, it can be damaged. Pay special attention while you unscrew the knobs and pulls if you want to reuse them.
You can prefer labeling the drawers and even marking the screws if there are multiple-sized screws used in the whole cabinet. It will be constructive if you are going to give your cabinet a multicolor design. We know that oak is a durable wood, but still, you should do the unscrewing extra carefully.
2. Clean The Whole Cabinet Thoroughly
The next crucial step is to de-gloss the surface and remove dust from the doors. You can use TSP to clean since it is effective. Cleaning before following any other step would ensure the paint will not peel in the future. Some particles are not visible to the naked eye, so it is nice to clean the cabinet with a soft bristle brush because it will not only clean the surface but will also keep it safe.

After the brushing part is done, use a rag to soak the wetness. Remember to clean everything, from the main cabinet to removed drawers, hinges, and knobs. Cleaning brings its shine back. It provides significant benefits; the paint will retain better, and it will decrease the use of sandpaper.
Another thing you can do if you don’t have a degreaser product is just pick dish soap from the kitchen and mix it with water, apply and clean the cabinet. Following you have done cleaning, sand the surface with 80-grit sandpaper.
3. Apply Spackle
In this step, we have got a cabinet with a clean and almost completely smooth surface. The next thing is simple. Create a joint compound by adding putty or drywall mud according to the dimensions of your cabinet. Keep mixing until you find a consistent mud-like formation.
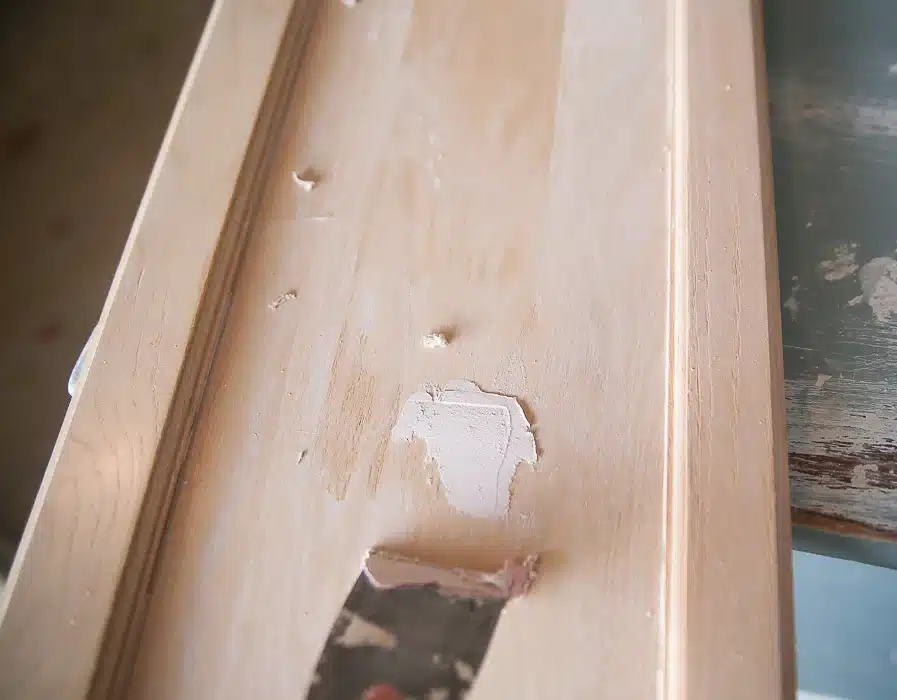
Now, it is time to use one of the tools we mentioned initially, a putty knife. Apply a small quantity of joint compound and spread it all over the surface. If the condition of your oak cabinet is not too good, consider filling the gaps with a joint compound. Just use the knife to level the surface of the wood by adding a compound as required.
Another crucial point to notice is regarding the application. Just use a thin layer of the compound; otherwise, you will end up using a lot of sandpaper.
4. Sand the Surface
We have applied the putty, and it’s high time we wore our safety gear. After the putty dries, we need to use sandpaper to level the surface. Sanding involves dust that can harm our skin and eyes, and in case you inhale some, you will have to face constant sneezing. Overcome dust-related problems with a safety mask or glove so that you can prevent yourself from inhaling dust and protect your eyes from dust harm.

Now that we are ready for the sanding, it is time to get our hands on sanding with 220-grit sandpaper. Check the surface manually after every sanding attempt to ensure the putty has settled. Just rub the hand over the surface and feel if it has become level or not. If some parts of the cabinet need a bit of balancing done, give them another round of sanding.
Use sandpaper with a smaller number if you find 220 grit challenging or not providing you with the needed outcomes.
5. Apply Primer
Dusting was a challenging task this time. Let’s move to the primer now. It becomes crucial, especially if you’re thinking of painting your oak cabinet white, because grain exposes and reflects more on the white color.

Primer works as a base for paint, and if you use an oil-based primer, it will hold the primer better. If you want to provide the paint with a better grip, consider sanding it after every layer with 220-grit sandpaper which will hide the grains greatly. Apply at least two coats of oil-based primer according to the condition.
The oak cabinet contains tannin in it that bleeds through a water-based primer; hence, an oil-based primer acts as a protective barrier that doesn’t let the tannin, an orange color oil, pass through the surface.
Utilize a foam roller to coat the primer, and try to close a roller with very soft foam instead of traditional rollers since they may leave spots and ruin your endeavors. You can also use oil-based primer spray for a professional look.
6. Paint
Finally, it’s time to paint oak cabinets. We have reached the final phase of transformation, painting the cabinet. Unleash your artistic skills and gather equipment to get the paint job done. Enamel Paint is preferred for painting an Oak Cabinet.
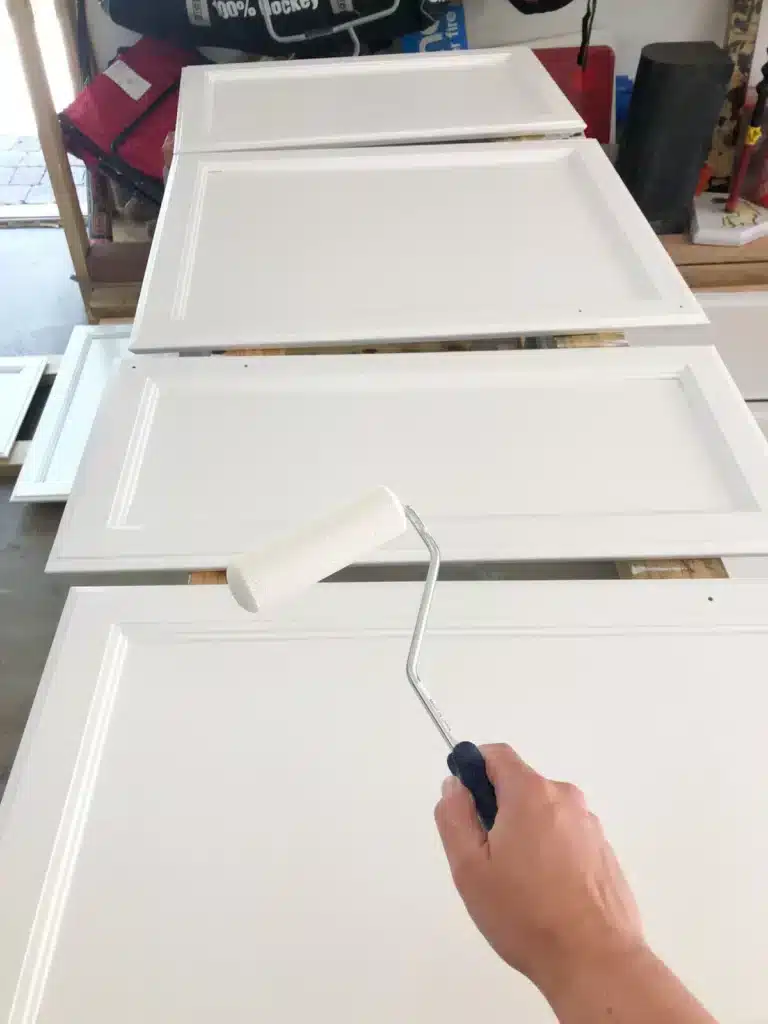
Wear your gloves, bring a brush, and start applying the paint. It is best to use a small-sized roller because it can reach places where a larger one can not. Moreover, it will provide better painting results. Use efficiency for smooth strokes; otherwise, later, you’ll find drip marks on the cabinet as the paint dries.
Application through a sprayer can be more satisfying, and the finish will also be improved significantly. Blend the paint with water and spray efficiently. It is always the best idea to apply nonsticky masking tape and deal with challenging angles before going further. Apply two coats of enamel paint for perfection. You will encounter grains after the first coat, but after the second and final coat, they will vanish.
Yay! Mission accomplished. We painted the oak cabinet; look at the beauty. Now, its life and durability have increased significantly.
7. Drill Holes for New Hardware
Painting was a tough and lengthy process, phew! Is the project over? It is if you don’t have an idea of updating the cabinet with additional hardware. Conversely, in case you want to add different hardware, either knobs or drawers or doors, you will have to deal with some more painting and drilling.

Changing the hardware will add a new character and personal feel to the cabinet. For example, if your cabinet had rustic or classic brass knobs, you might like to change it with a large-sized modern black one; there will be a need to drill new holes to place them. One good reason for choosing additional modern hardware is that you can find enormous information to find out how to install them.
One thing you can do to install them perfectly is to use a smartphone app or just mark dots on a masking tape and paste it on the drawer and voila! Perfection.
Conclusion
We have provided a step-by-step guide on how to paint oak cabinets and hide grain. Throughout the blog, we tried to transform an old oak cabinet into a new one. The first step is to gather the essential equipment for painting and filling the grains.
Immediately, we moved to the significance of care while disassembling the cabinet. And after that, we elaborated on how to clean the surface, followed by sanding with 80-grit sandpaper.
The most crucial step was filling the grains with a putty knife but only using a thin layer of joint compound. Once more, there was a mention of sanding, but this time we used 220 grit sandpaper for a smoother finish.
The next thing we mentioned was the use of an oil-based primer that can stop the grain caused by tannin in the oak. As a bonus, we also mentioned how you can install the additional hardware to make things easy for you.
We wish you the best of luck with your Oak cabinet painting project. Happy painting!


