
The Complete Guide to Painting Wood Floors in 6 Steps
If you are the kind of person who loves being creative and innovative while also staying on budget, Here is a new way in which you can give your place a new makeover: Painting wood floors is one of the most transformative and budget-friendly ways to level up your space.
Whether you want to experiment or you are bored with hardwood floors, this article will help you with a step-by-step procedure for achieving a professional-looking, beautiful, and aesthetic wooden floor.
So, grab your tools and roll up your sleeves while you read this article because it is going to be a quick, easy, and fun process to learn about how to paint wood floors in just 6 steps.
Step 1: Let Go of Everything on the Floor

Before you get into the process of painting your floor, remove everything that is on the floor, Be it the rug, furniture, lamp, television, or anything else. Clear your floor area so that you have a clear, clutter-free space to work in and prevent any paint spills or damage.
Once you have cleared the area, clean it. Make sure to remove dust, dirt, etc. Use a mop or an electric vacuum device to let go of things that might come in between you while you are painting hardcover wood. Once the area is clean, make sure to check if there is any residue of dust left on the edges, corners, or anywhere else.
If you are still not sure about the floor being clean, then use a mild detergent to remove any residue or marks and clean the floor with all your strength. This might seem like a lot of hard work, but trust the process. It is worth it in the end.
If there are any stubborn stains or marks on the floor, you may need to use a wood cleaner or detergent solution to remove them. Rinse the floor thoroughly after cleaning to ensure that no cleaning residue is left behind.
Step 2: Let’s Sand the Floor

Paint for hardwood floors is only possible when you sand the floor properly. What exactly does sanding the floor mean, and why is it important? Let’s find out.
Sanding the floor helps create a smooth surface for the paint to adhere to. If the surface is smooth and without any bumps, it would be easy for you to paint the hardwood floor. How can you do that? You can use a floor sander or a sander with tight or medium grit sandpaper to sand the entire place you want to paint. To ensure the best result, make sure to move in the direction of the wood grain.
If you have previously painted the floor, then ensure that you sand all the areas of imperfection until they are even. This process will not only improve the paint’s adherence but also leave no room for imperfection.
Step 3: Let’s Clean the Floor Again
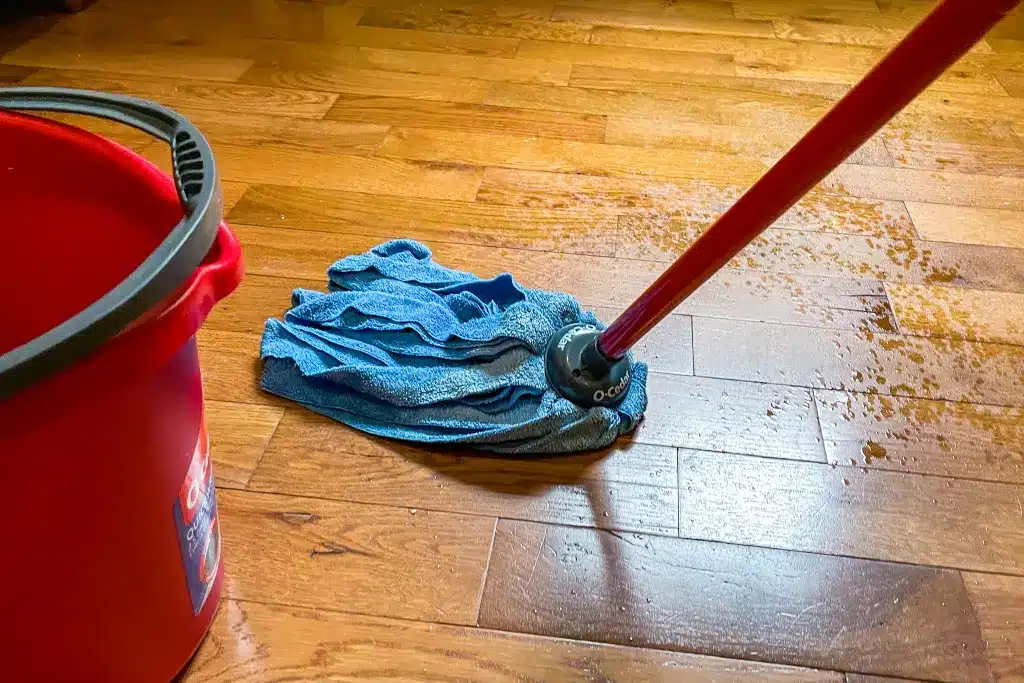
Once you have sanded the entire floor, it is time to clean the area once more to remove any sanding residue or dust that can affect the paint’s adhesion in the future. You can clean the area by using an electric vacuum cleaner, or you can use a mop to clean up any loose particles that might become a problem while you paint hardwood floors. We promise you that this is the final cleaning step in this guide. We emphasize cleaning because this will ensure that you have a smooth and top-notch finish once you paint hardwood floors. Because you deserve the best floor out there.
Also, ensure that any mild detergent or solution you used before for cleaning it off the floor is completely clean, and then try the following steps.
Step 4: Now, Let’s Apply the Primer
This is a very crucial step in the painting process for hardwood floors, as it helps create a strong base between the wood and the paint surface. You should ensure that the primer you are using is designed for wooden use, which ensures compatibility with other types of paints you want to use in the future.
To apply the primer, you should use a roller or a paintbrush. You should start by applying a coat of primer to the entire floor. One of the tips that can be very useful for you is to apply primer in small patches. This helps prevent leaving roller or brush marks on the floor. For more details about the products, read the instructions provided on the container of the primer. This will help you get the best results, and it will give you instructions about the time and number of coats of primer that are required.
Now wait for the primer to dry. Primer is important because it gives a base for paint to stick to and also helps you find areas that need more sanding and other minute details.
Once the primer is dry, ensure that the floor is dry and check to see if other areas require any touch-ups. Notice the minute details, and then continue to the next steps.
Step 5: Let’s Paint the Floor

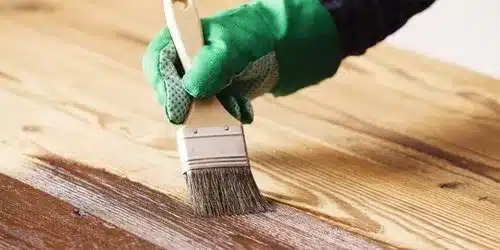
We are finally in the most exciting part of the process—giving the color you wanted on the floor. Before coloring the floor, you need to select paint that is manufactured for areas that have high traffic and offer excellent durability. Also, ensure that you have selected a color that goes with your space and vibe.
Once you have selected the color, pick up the brush, give the brush a dip in the color, and let it start rolling. Start with the corners and drag it towards the exit. Now keep doing that and try not to build up or avoid drips and mishaps.
Do that for your first coat. Once the coat is dried, look at it and your desired aesthetic; if it does not match, apply another layer of coat, but ensure that the first coat is dried before applying any other layer. Read the instruction guide before applying any coat to the floor.
Paint for hardwood floors can be really fun, but it can also get dangerous if there is no proper ventilation in the room. So, switch on the fan, open up the windows, and let the air come and go so that there is consistency in circulation. Also, take breaks and relax while doing this to avoid injury and fatigue because this can get tiring.
To ensure that you get the most seamless paint for hardwood floors, make sure that the edges of the paint remain wet. This helps blend the new stroke with the previous one, giving it a crisp finish.
Step 6: Let’s Give Our Paint a Layer of Protection

Did you love the color of your new paint for hardwood floors? Now let’s give it longevity and shine. As the floor is a place that will be used daily and would be very prone to scratches, etc. To give your floor a protective layer, choose a Polyurethane or water-based sealer that will give it sheen and durability. They are one of the most popular choices for protecting the paint on hardwood floors.
To give this layer of protection, you should clean a paintbrush or roller, dip them into the liquid, and apply the layer. Do that to the entire floor and surface, and remember to divide the sections into multiple sections so that you can get the best result. Also, read all the manufacturer’s instructions regarding the number of coats you need and the drying time between them.
Ensure that no one comes into the area, or you put the furniture on the floor before it is carefully dried because it can take days for it to cure fully. Doing this will prevent any premature damage to your floor.
Helpful Tips to Paint Your Wooden Floor
- Keep a vacuum nearby while painting the floor because dust is part of the process and will keep coming through.
- Instead of using floor paint, use cabinet paint and add a hardener to it. This trick might save you a lot of time.
- Check the size of the brush before selecting one; choose a brush that is no longer than the plank size for the desired results.
Now that you have brand new paint for hardwood floors let’s understand how you can maintain it. To ensure that your paint for hardwood floors stays new, here are a few steps that you should follow:
- Ensure that you regularly clean the surface of the floor and remove any dirt or debris from the floor. This will make sure that there is no fungus or other bacterial activity going on inside the floor.
- Using mild detergents will give your hardwood floors another life. They will ensure that the floor remains clean, yet unlike strong detergents, they will not take away its shine.
- Do you know certain pieces of furniture that have pointy corners and certain areas that are always filled with people? Then use a rug to put it on the floor, and this will add another protective layer to your floor.
- Can you not put rugs everywhere? Add protective pads to the sharp areas of your furniture; this will ensure that they do not ruin the paint on the floor. As heavy furniture with sharp corners can really scratch the surface of the floor, a protective pad on the corners will not let that happen.
- Whenever there is a spill, make sure that you clean it properly and quickly so that it does not ruin the paint on the floor. Make sure that the chemicals you are using to clean the floor are harm-free and do not ruin the painting on the floor.
Conclusion
If you are someone who is looking to change the appearance of their room and wants a new look and feel, painting hardwood floors can really be a game changer. Painting the wood floor can really change the vibe and aesthetic of your place and give it a new look and feel. The above six steps have been researched and tried so that you do not face any issues while you paint your wood floor. The above six steps will give you a professional way to transform your space.
All you have to do is read the article and description on the back of the cover, and you will definitely get that professional finish. Remember, it is also about time and dedication; give the painting time to dry, clean, and repeat. Choose a time when you can devote your attention to the renovation and ensure that no mistakes happen.
Now that you have changed the color of your wooden floor, it is time to redecorate your room with new furniture.
Curious about new furniture trends and updates? Follow our page to read about the latest interior insights and so much more.


