
Vertical Shiplap Wall in Bathroom: All You Need to Know
Have you ever thought about giving your bathroom a brand-new look? Then consider Shiplap, which could be a great addition to your bathroom. It will also bring a lot of benefits to your bathroom space as well.
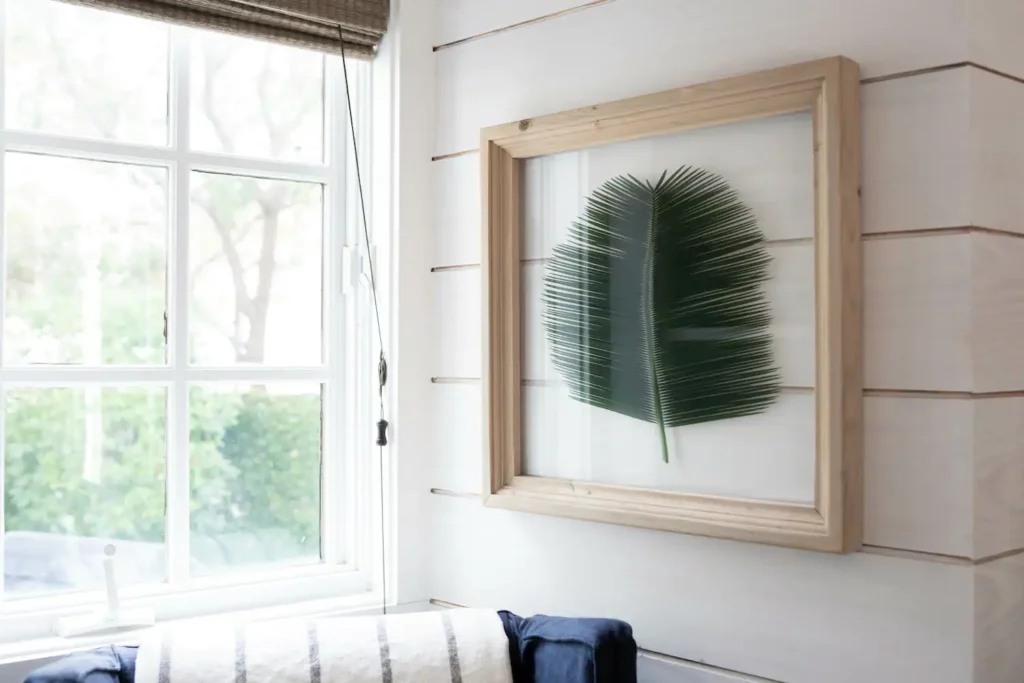
Before getting into the details, let us first understand what a Shiplap wall is. A Shiplap wall is a timeless and versatile interior design that can instantly elevate the look of your bathroom. Whether you prefer a rustic farmhouse aesthetic or a modern coastal vibe, a Shiplap wall in bathroom adds texture, depth, and character to any space. While horizontal
Shiplap is a popular choice, and vertical Shiplap brings a unique and appealing visual effect. They both are appealing and unique and bring an entirely new vibe to your bathroom. In case you manage to install any of these shiplap walls in the bathroom, it will set your space apart from others.
In this guide, you will be walked through the process of transforming your bathroom with a stunning vertical Shiplap wall.
Benefits of Adding a Shiplap Wall in Bathroom
Before diving into the details of Shiplap installation, let’s take a moment to explore the benefits of getting this design trend into your bathroom.
- Vertical Shiplap creates an illusion of a heightened ceiling. Since the Shiplap boards run vertically from floor to ceiling, your eyes would naturally draw up. This way, the space will look taller and vast. This effect can provide a useful result if your bathroom is with a low ceiling and limited space.
- Vertical Shiplap walls are known for their ability to resist moisture. As you know, bathrooms are areas with high moisture. So in order to prevent issues like mold and all, you need to use materials like PVC or moisture-resistant wood. Vertical Shiplap also allows water to pass without interruption, reducing the risk of water damage.
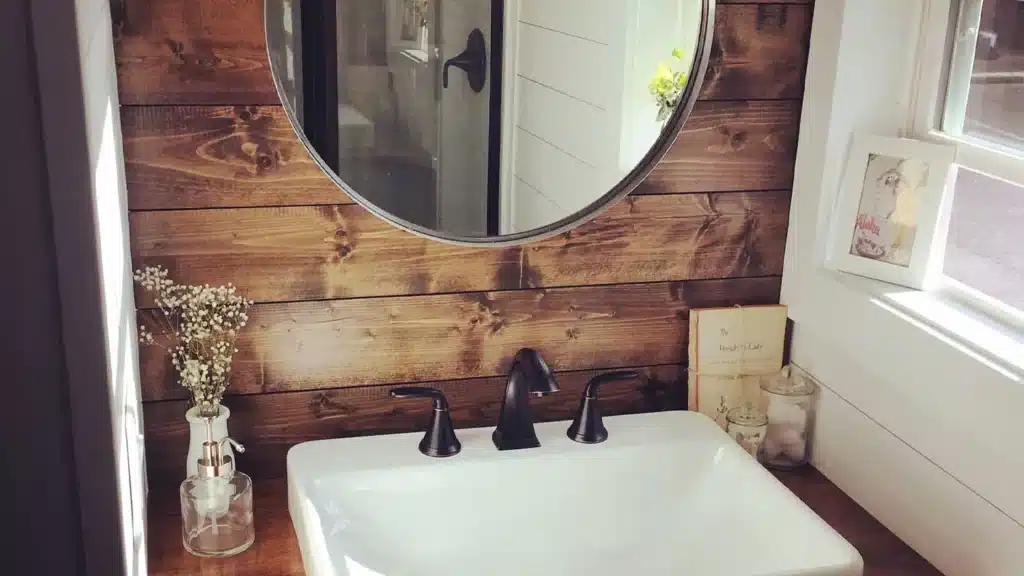
- Vertical Shiplap wall in bathroom adds such an interesting dynamic to your bathroom design that you have never seen before. The vertical lines of Shiplap boards bring texture and depth, making them visually appealing. In case your bathroom is plain and ordinary, it can transform the look with more character and personality.
- Shiplap is a classic and timeless design element that has been used in the world of interior design for years. You, too, can achieve a timeless look that won’t go out of style ever by adding a vertical Shiplap wall in bathroom. It offers you a combination of modern and traditional aesthetics, which is versatile in future design changes.
- A vertical Shiplap wall in bathroom is comparably easy to clean and maintain. Since the surfaces of the Shiplap boards are smooth, it makes it simple to wipe down and keep clean. You can do it yourself regularly with a vacuum or some water and vinegar solution.
- Moreover, when you are installing a Shiplap wall in bathroom, you are taking a step ahead of other homeowners. Shiplap is a popular design feature that can make your bathroom stand out to potential buyers. It also adds a touch of luxury and sophistication, and as a result, your bathroom looks more attractive than ever.
How to Choose the Right Material for Your Vertical Shiplap Wall
Let’s say that you have finally decided to install a Shiplap wall in bathroomafter reading about the benefits. Now you have to choose the right material if you want to get the desired look and aesthetic.
Scroll down to learn about different materials used for vertical Shiplap walls and other key things to consider before buying.
When it comes to a Shiplap wall, you can use a variety of materials. While wood is the most popular choice, you can go for some other materials as well.
1. Wood
Wood is a popular choice for Shiplap walls because of its beauty and the warmth it brings. The most commonly used wood material is plywood which is much more affordable than others. However, plywood is mostly used for horizontal Shiplap rather than vertical ones. So if you want to use real wood for your bathroom, then go for pine wood.
2. MDF (Medium Density Fiber)
MDF, or medium-density fiberboard, is an engineered wood product made by compressing wood fiber and resin. It is an affordable option for Shiplap walls to get a modern design with a low budget. It provides a smooth surface for painting as well. However, it is not suitable for areas with high humidity as it absorbs moisture.
3. PVC

PVC Shiplap panels are made of highly durable plastic material. These are moisture-resistant, so you can definitely install them in areas such as bathrooms. Additionally, these panels are lightweight, easy to install, and you don’t have to worry too much about maintenance. Also, they are available in a wide range of colors and finishes.
4. Metal Panels

Metal Shiplap panels, such as nickel, steel, or aluminum, are unconventional yet stylish choices when it comes to your bathroom interior. They offer durability, low maintenance and are not to mention the most affordable option for vertical Shiplap. These walls are best known for providing a sleek and modern look with a variety of colors and textures.
Inspiring Ideas for Installing a Shiplap Wall in Your Bathroom Décor
Installing a Shiplap wall in bathroom brings a fresh and inspiring look to the space. Here are some unique ideas to consider when choosing vertical Shiplap in your bathroom.
1. Rustic Farmhouse

Embrace the rustic charm by using reclaimed wood. The weathered texture and natural imperfections will bring a sense of warmth and character to your bathroom space. Make sure not to color the wooden Shiplap to get a more rugged look that goes perfectly well with vintage features such as a tub or antique accessories.
2. Coastal Retreat

Create a serene coastal vibe by pairing vertical Shiplap with a soft color palette. Go for light blue, turquoise blue, or seafoam green Shiplap panels, which definitely bring out a beachy vibe. Complete the look with natural wood accents such as flax plants or bamboo accessories.
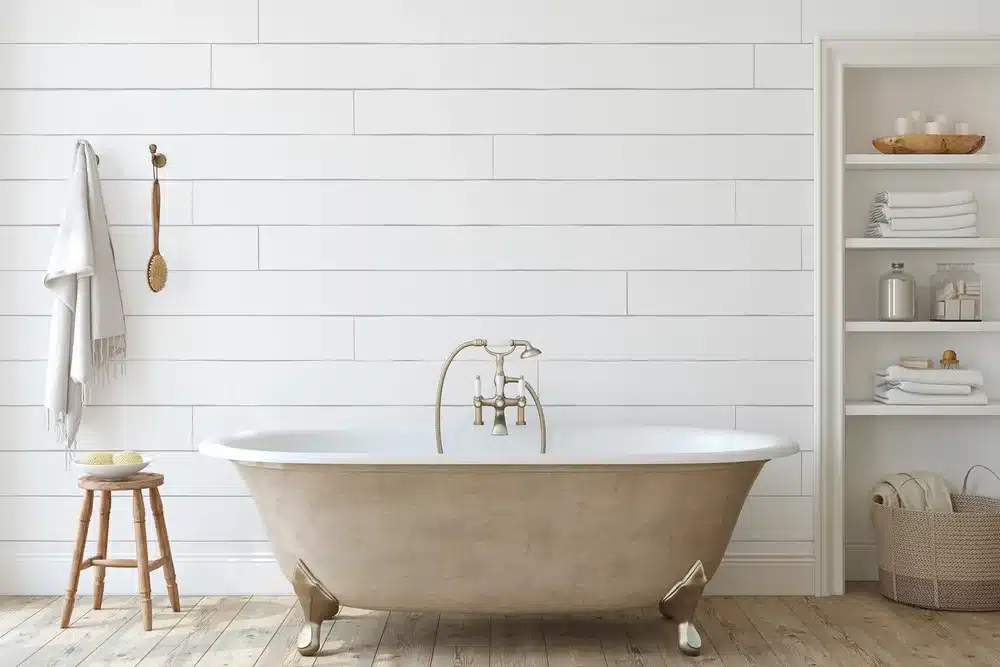
3. Modern Elegance

For a sleek and contemporary look, choose vertical Shiplap panels in a crisp white color. The more minimalist approach you take, the more modern it will look. It also creates a sense of larger space and allows the other design elements to stand out. Pair it with modern features such as floating vanity or geometric patterns for a sophisticated look.
4. Blissful Oasis

Create a calm and luxurious atmosphere with a vertical Shiplap in a relaxing neutral color such as pale grey or creamy beige. The idea of a blissful oasis of vertical shiplap for your bathroom will add texture, depth, and a touch of rustic charm. This idea will give a serene and stylish atmosphere to your space. It creates an inviting coastal look to your bathroom.
Step-By-Step Guide for Installing Vertical Shiplap Walls in Your Bathroom
Installation of vertical Shiplap walls in your bathroom can be a rewarding DIY project for you. Here is a step-by-step guide to help you through the whole process.
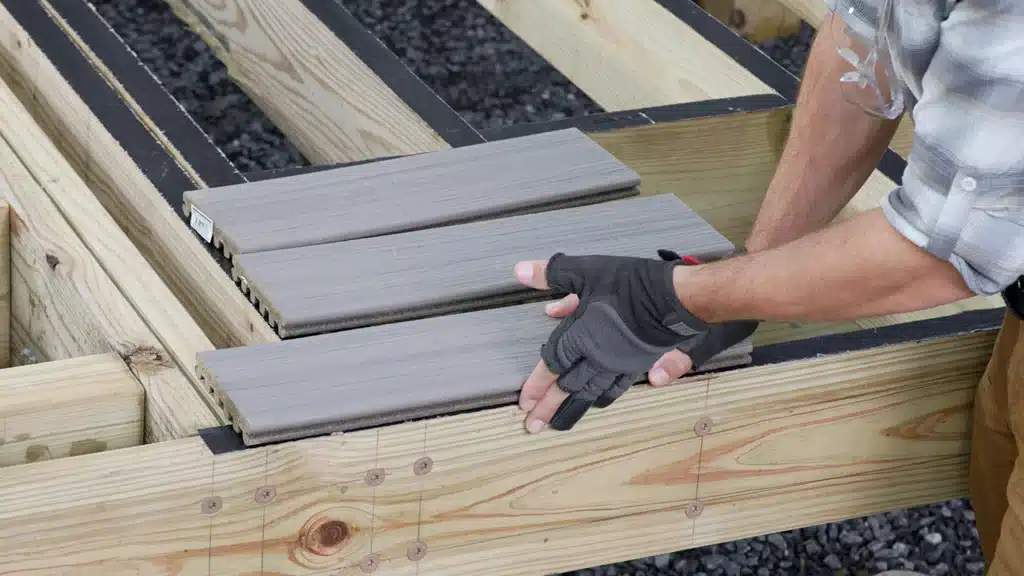
1. Collect Materials and The Necessary Tools
First of all, you need to start by collecting the necessary materials and tools. Consider the width and thickness of the planks keeping in mind the scale of your bathroom and the desired aesthetic. Thinner planks create a more delicate and subtle look, while wider boards make a bolder statement.
Then you need to gather the tools you need for the installation.
2. Prepare the Walls

Before you start installing the Shiplap boards, it’s essential to prepare your bathroom properly. Begin by removing any existing features, such as towel bars or selves, from the wall where the Shiplap will be installed. Fill any holes or cracks in the wall with sparkle and sand.
Next, make sure that the wall is clean and dry, free from any dirt or moisture that could compromise the adhesion of the Shiplap. Finally, apply a coat of primer to the wall to create a smooth and even surface.
3. Locate Studs

A wall stud is a vertical piece of framing within the walls. These studs are used to hang heavy to light objects on the wall. There are multiple techniques available to find a stud in the wall, or you can also use a stud finder to locate the vertical studs behind the wall. Then mark the stud locations on the wall with a pencil. You can get the stud finder online as well as in stores.
4. Measure and Cut Shiplap Boards

Now comes the exciting part of installing the Shiplap boards on your bathroom walls. Start by measuring the height of the wall and cut the board accordingly. Use a miter saw to cut the Shiplap boards according to the measurements.
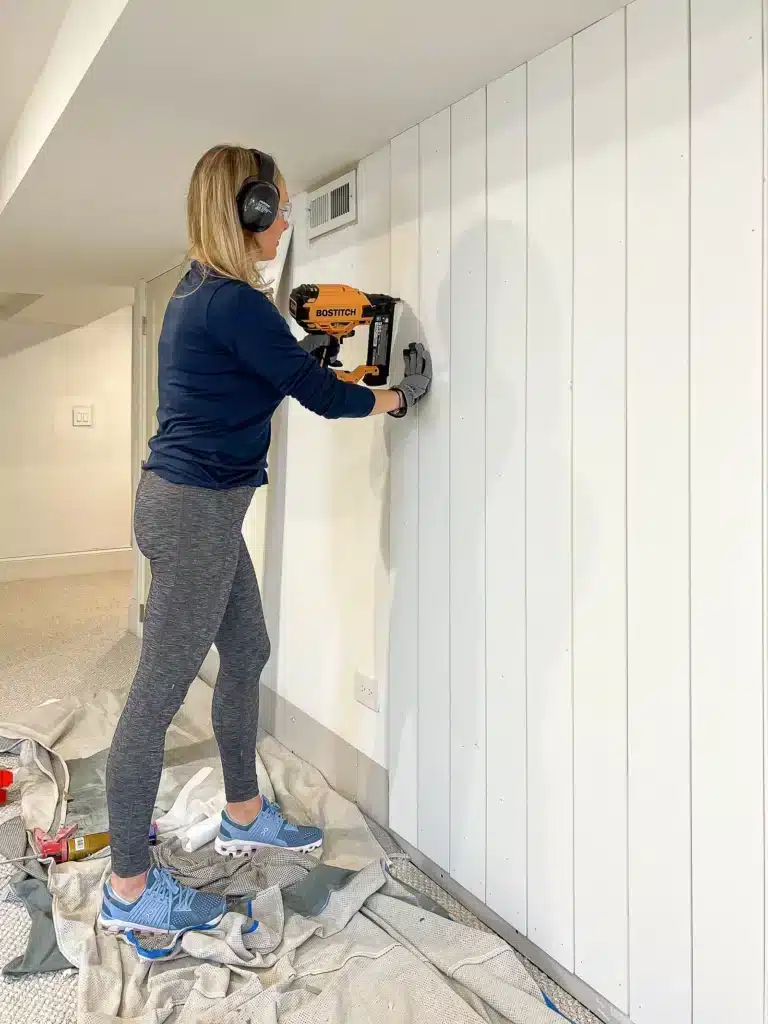
5. Install the First Board
Use a level to make sure that the board is straight and secure it to the wall with a nail gun. You need to place a nail at the top and bottom of the shiplap board where it crosses studs. You can do this activity with the help of a nail gun. Also, use adhesive to glue the board to the wall. You can take the help of someone for this step as it is very important that every board install at its specific pre-decided place. Place spacers between each board to provide the characteristic grooves of Shiplap.
6. Continue Installing
Apply some construction adhesive to the back of the next Shiplap board. Slide the tongue of the new board into the groove of the previous board, making sure that it fits perfectly. Use a level to check that the board is straight and nail the board into the studs.
Repeat the same process and add more Shiplap boards until the entire wall is covered.
7. Cut and Install Around Additional Fixtures

Now that the boards are installed, it’s time for you to measure the areas where the Shiplap needs to be cut to fit different fixtures. Carefully cut out the necessary openings and install the cut boards around the fixtures. Make sure that they fit properly.
8. Finishing Touches
To complete your Shiplap wall and achieve a polished look, there are a few finishing touches and tips to keep in mind.
Firstly, consider painting the Shiplap to match your bathroom’s color scheme. A crisp white paint can create a fresh and clean aesthetic, while a stain can enhance the natural beauty of the wood.
Next, install trim along the edges of the Shiplap to create a transition between the wall and other surfaces. This finishing touch adds a professional and polished look to your Shiplap walls.
Lastly, consider accessories such as floating shelves or artwork to enhance the visual appeal of your bathroom and complement the Shiplap wall.
You can visit here https://www.youtube.com/watch?v=iGn5YHdq-i4 for the DIY tutorial and follow the instruction for accurate work.
How to Maintain and Care for Your Shiplap Walls
While Shiplap walls are relatively low maintenance, it is essential for you to follow a few tips to ensure that they last long. Regularly dust the surface of the Shiplap using a soft fabric or a duster to remove any dirt. Avoid using harsh chemicals as they could damage the surface or strip away the finish.
In case of any stains or spills, gently wipe them away with a damp cloth and mild soap. Monitor the humidity levels of your bathroom and use proper ventilation to prevent excessive humidity and moisture, which could eventually damage the Shiplap.
Conclusion
A Shiplap wall in bathroom could be a game-changer when it comes to transforming your bathroom into stylish territory. From timeless appeal to its practical benefits, you can’t go wrong with Shiplap to add character and a little warmth to your bathroom. It helps you to create a stylish and stunning atmosphere in your bathroom.
No matter what kind of look you are aiming for, this idea of a shiplap wall in bathroom will adjust and settle with everything. Catch the opportunity to re-décor your bathroom space and give it a warm and inviting look. By following the step-by-step guide provided above, you can easily install and maintain a stunning Shiplap wall in bathroom.
So, why wait? Start your Shiplap journey today to enjoy the beauty and calm that come with it.


